Crafting a robust diy stage platform doesn’t have to be an intimidating endeavor. Whether you’re planning a community talent show, a corporate presentation, a band’s debut, or simply need an elevated display area for a trade show, building your own platform offers incredible flexibility and cost savings. This isn’t just about nailing a few planks together; it’s about understanding the nuances that transform simple materials into a safe, stable, and visually appealing foundation for any event.
At a Glance: Building Your DIY Stage Platform
- Strategic Planning: Understand your stage’s purpose and measure your space precisely before cutting any wood.
- Material Savvy: Select durable lumber and plywood, prioritizing structural integrity over cutting corners.
- Structural Stability: Focus on robust framing, proper bracing, and secure fasteners to prevent wobbles and ensure safety.
- Safety First: Integrate non-slip surfaces, handrails, and adequate support from the outset.
- Smart Finishing: Consider aesthetics and practical elements like skirting and cable management for a polished look.
- Code Compliance: Always check local building codes, especially for public events, to avoid safety hazards and legal issues.
Foundations First: Defining Your Platform’s Purpose and Place
Before any saw dust flies, you need a crystal-clear vision for your stage platform. This isn’t just about deciding if you need a stage, but what kind of stage. Is it a temporary 3×5 foot riser for a solo acoustic act, or a larger, semi-permanent structure destined to host a full band and their equipment? The answers will dictate everything from material choices to design complexity.
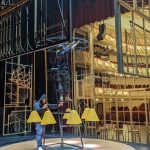
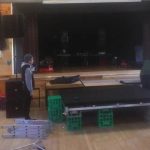
Begin by determining the primary purpose. A public speaking platform might prioritize clear sightlines and easy access, while a dance performance stage demands a perfectly smooth, resilient surface. For a boxing match, the sheer force and impact resistance become paramount. Consider if your platform will also provide temporary seating for guests, or if it needs to support heavy equipment like large speakers or lighting rigs. Understanding these variables early prevents costly redesigns or structural compromises down the line.
Next, measure your designated space with meticulous accuracy. Don’t just eyeball it; grab a tape measure and account for not only the stage’s footprint but also any surrounding areas like backstage, audience flow, and emergency exits. Think about the desired platform height – a few inches for a subtle elevation, or several feet for grand visibility. For outdoor events, assess ground stability and drainage, as these will directly influence your foundation design.
Once you have your measurements and purpose defined, sketch out your design. This doesn’t need to be architectural blueprint-grade, but a clear diagram outlining the shape, size, and any integrated features like steps, ramps, or handrails. This visual roadmap helps identify potential challenges and ensures all components fit together seamlessly.
Navigating the Regulations: Building Codes and Safety
While a DIY project often implies freedom, public events and temporary structures still fall under regulatory scrutiny. Ignoring local safety standards and building codes isn’t just risky; it can lead to severe penalties or, worse, accidents. For instance, temporary stages for public events might require specific load-bearing capacities, railing heights, or fire-retardant materials. Always consult your local municipality’s planning or building department. They can provide essential information on permits, inspections, and specific requirements for elevated platforms. Even if your event is private, understanding basic safety principles for structural integrity and egress is non-negotiable.
Choosing Your Materials Wisely: Strength, Durability, and Longevity
The right materials are the backbone of a safe and sturdy diy stage platform. Skimping here is a false economy.
- Lumber: High-quality lumber is non-negotiable. For frames, 2x4s and 2x6s are common for smaller, lighter-duty platforms. However, for sturdier, more permanent, or higher-capacity stages, opt for 4x4s or even 6x6s for vertical supports and main beams. This provides significantly increased rigidity and weight-bearing capability. If building outdoors, pressure-treated lumber is essential to resist rot and insects. Ensure all wood is dry and free from significant warps or knots that could compromise strength.
- Plywood/Decking: For the stage surface, ¾-inch thick plywood is a standard, robust choice, offering excellent stability and weight distribution. Common sheet sizes are 4×8 feet, which you might cut into more manageable 3×4 ft or similar pieces depending on your design modules. For outdoor stages, consider exterior-grade plywood or decking boards, which offer superior weather resistance and can provide a non-slip surface if textured.
- Fasteners: While nails are quick, screws offer a significantly stronger and more secure finish, especially for platforms that might be moved or endure stress. Use appropriate length screws – 2.5-inch or 3-inch deck screws are often suitable for joining 2x lumber. For heavy-duty connections, consider carriage bolts with washers and nuts for maximum strength.
- Bracing and Support: Don’t underestimate the power of cross-bracing. Simple diagonal supports between vertical posts or across the underside of the frame prevent lateral swaying and enhance overall stability.
- Optional Enhancements: For a professional look, consider stage skirting to conceal the frame and any stored equipment. Non-slip surfaces are vital for performers and speakers, especially if the stage is exposed to moisture or heavy use. Handrails are a crucial safety feature for any steps or ramps.
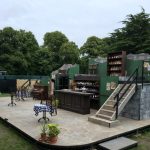
A quick note on using wooden pallets: while they seem like a budget-friendly option, ensure they are dry, in good condition, and free from splinters, rot, or chemical treatment. They can work for a rustic, temporary platform, but you’ll still need to reinforce them with additional lumber and plywood for a stable, level surface. When using pallets, use 3-inch screws to attach plywood (one screw for every two pallets, two screws per side) and 1.5-inch to 2-inch deck screws throughout for pallet-to-pallet connections.
Budgeting for Success: More Than Just Wood
Your budget should cover more than just the raw materials. Factor in costs for tools you might need to buy or rent (e.g., a circular saw, impact driver), safety gear (goggles, gloves, ear protection), paint or stain for finishing, and any accessories like stage skirting, lighting, or sound equipment. A common pitfall is underestimating the cost of fasteners – you’ll need more screws than you think! It’s always wise to add a 10-15% contingency for unexpected expenses or material miscalculations.
The Build: Step-by-Step Platform Construction
This is where your planning and material selection come to life. Precision at each stage ensures a safe, stable, and long-lasting platform. Building a solid platform is the first critical step in creating a full performance stage. For broader guidance on integrating lighting, sound, and other stage elements once your platform is ready, you can always refer to the comprehensive guide on how to Build your own performance stage.
Constructing the Frame: The Skeleton of Your Stage
- Cut Lumber to Length: Accuracy here is paramount. Measure twice, cut once. Use a circular saw for clean, straight cuts. If your design includes modules, cut all identical pieces simultaneously to ensure consistency.
- Assemble the Base: Lay out your cut lumber for the base frame (the perimeter of your platform). Ensure it forms perfect right angles and is flat and level on your work surface. Secure the pieces with screws, driving them through the face of one board into the end grain of the other, or use metal connector plates for extra rigidity.
- Case Snippet: For a modular 4×6 foot platform, you might cut two 6-foot lengths and two 45-inch lengths for the outer perimeter, plus a few 45-inch cross supports. The 45-inch pieces account for the width of the 2x4s forming the 6-foot sides (48 inches – 1.5 inches – 1.5 inches = 45 inches).
- Install Vertical Supports: Once the base is assembled, attach your vertical supports (legs) at regular intervals. For a sturdy 4×6 foot platform, you might place legs at each corner and at the midpoint of the longer sides, and possibly a central support. Ensure these are perfectly plumb (vertical) and securely fastened to the base frame using screws driven from both sides of the base into the leg, or by using structural corner brackets.
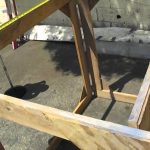
- Add Cross-Bracing: This is a crucial step for preventing swaying and sagging. Install diagonal cross-bracing between vertical supports, especially on the longer sides or for taller platforms. These don’t need to be full-length diagonals; even short pieces angled between a leg and a horizontal beam significantly improve stability. For larger stages, consider adding horizontal “ribs” across the top of the frame before adding the flooring, especially if your platform will span more than a few feet between supports.
- Secure All Connections: Go back over every joint and ensure all screws are tightly driven. Add extra fasteners where you feel there might be any give or wobble. A well-constructed frame should feel absolutely solid before any flooring is applied.
Adding Flooring and Supports: The Decking and Reinforcement
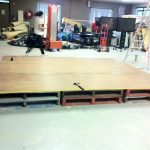
- Install Plywood or Decking: Lay your ¾-inch plywood sheets or decking boards on top of the completed frame. Start from one edge, ensuring the first piece is perfectly flush. Secure the plywood to the frame using screws every 6-8 inches along the perimeter and into any internal cross supports. Make sure the screw heads are flush or slightly countersunk to avoid creating tripping hazards or uneven surfaces.
- Tip: If using multiple plywood sheets, ensure their edges meet precisely over a frame member for maximum support. Do not let edges “float” between supports.
- Add Support Beams (If Needed): For larger or heavier-duty stages, or if your frame members are spaced widely, you might need to add additional support beams directly beneath the plywood, running perpendicular to the main frame supports. These beams distribute weight more evenly across the platform and prevent sagging over time. Secure these to the underside of your main frame.
- Construct Ramps and Steps: If your design includes ramps or steps, build these as separate, sturdy units and then securely integrate them into the main platform. Ensure steps have consistent rise and run, and ramps have a gentle slope (ADA guidelines suggest a 1:12 ratio for accessibility, though this might be overkill for temporary, light-duty ramps). Handrails are highly recommended for any ramp or steps, providing crucial support and safety.
Finishing Touches and Equipping Your Platform for Success
Once the core structure is complete, attention turns to aesthetics and practical functionality.
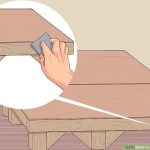
- Aesthetic and Protection: Apply paint or stain to your platform. This isn’t just for looks; it protects the wood from moisture, UV rays, and general wear and tear. Choose a durable, low-VOC paint or stain, especially for indoor use. A dark color like black or charcoal often provides a professional, discreet look that allows performers to stand out.
- Critical Safety Features: Beyond the structural integrity, consider surface safety. Apply non-slip strips or paint to the stage surface, especially if it might get wet or if energetic performances are expected. Install sturdy handrails on any steps or ramps – these are non-negotiable for public accessibility and accident prevention.
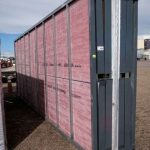
- Enhancing Presentation: Incorporate stage skirting around the perimeter. This inexpensive addition instantly transforms a raw lumber structure into a professional-looking stage, concealing the frame, equipment, and any stored items. You can also add signage, banners, backdrops, or curtains for branding or thematic design.
- Managing Cables: As an experienced specialist, I’ve seen countless trips and falls due to poorly managed cables. Plan for cable routing early. Create pathways, use cable ties, clips, or even channels built into the platform’s edge to keep all wires organized and secured, preventing hazards. This also helps maintain a clean, professional appearance.
- Accessibility: For public events, accessibility features like gentle ramps and designated, accessible seating areas are not only thoughtful but often legally required. Planning for these from the start is much easier than retrofitting.
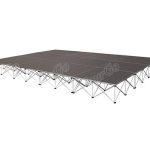
A standard stage platform module is often around 3×5 feet for ease of handling and transport, but a simple platform can effectively be made with two 4×8 foot plywood sheets, four 2x4s for support, and appropriate fasteners. The key is understanding how to leverage these standard dimensions into a customized, stable structure.
Quick Answers to Common DIY Stage Platform Questions
Q: How high should my DIY stage platform be?
A: The ideal height depends entirely on its purpose and audience sightlines. For public speaking or intimate performances, 6-12 inches can be sufficient. For larger venues or full bands, 18-36 inches might be better. Always consider performer safety and accessibility, especially with taller stages.
Q: Can I build a temporary stage that is easy to dismantle and store?
A: Absolutely. Focus on modular design. Build smaller, self-contained platform units (e.g., 4×4 ft or 4×6 ft) that can be bolted together. Use heavy-duty, removable fasteners like carriage bolts, and design legs that can be unbolted or folded for compact storage.
Q: What’s the best way to ensure my stage platform is level on uneven ground?
A: For slightly uneven ground, adjustable feet or shims under the legs can work. For significantly uneven terrain, you’ll need a more robust foundation system, potentially involving concrete blocks, leveling jacks, or building a sub-frame that itself can be leveled. Always use a spirit level extensively during construction.
Q: How much weight can a DIY stage platform typically hold?
A: A well-constructed platform using ¾-inch plywood and properly spaced 2×4 framing (e.g., every 16-24 inches) can hold a significant amount of weight, often hundreds of pounds per square foot. However, actual capacity depends on wood quality, fastener type, leg spacing, and bracing. When in doubt, over-engineer and add more supports, especially if the stage will support heavy equipment or multiple performers.
Q: Do I need professional help for a DIY stage platform?
A: For small, low platforms for private use, DIY is often feasible. For larger, taller, or public-facing stages, especially those needing to comply with building codes, consulting with a structural engineer or experienced carpenter is highly recommended to ensure safety and compliance.
Your Actionable Playbook for a Secure DIY Stage Platform
Building a diy stage platform is a rewarding project that combines careful planning with practical craftsmanship. You’ll gain a deeper understanding of structural integrity and safety. Start by clearly defining your platform’s purpose, meticulously measuring your space, and sketching a detailed design. Then, invest in high-quality materials like durable lumber and ¾-inch plywood, prioritizing strength with screws and cross-bracing. Build your frame with precision, ensuring every connection is secure and the entire structure is level. Finally, don’t overlook finishing touches like non-slip surfaces, handrails, and effective cable management to ensure both safety and a professional aesthetic. With these principles, you’ll create a stable, versatile foundation for any event.

- Constructing A Stage Builds Your Own Sturdy Performance Platform - June 5, 2026
- DIY Stage Platform Construction Is Easy for Any Event - June 4, 2026
- Simple DIY Portable Folding Stage Ideas for Events - June 3, 2026