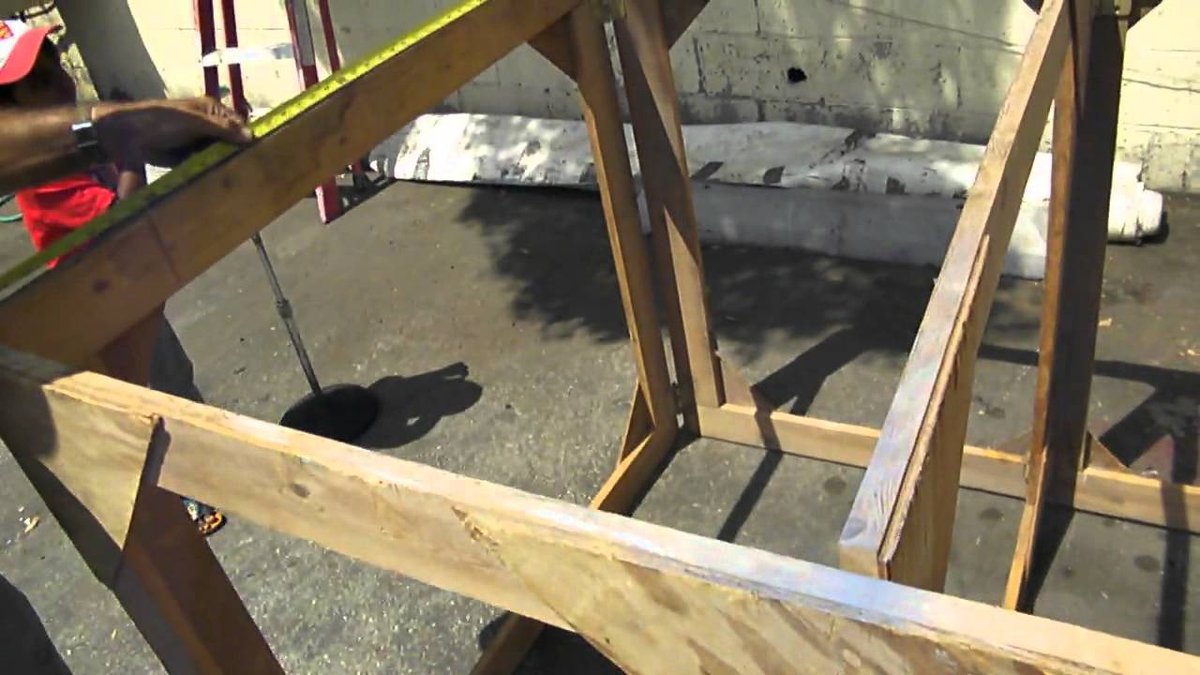
Whether you’re a budding musician, an aspiring public speaker, or simply need a sturdy platform for your next community event, the idea of a dedicated stage can transform an ordinary space into something extraordinary. Building a diy stage might sound like a daunting task, but with careful planning, the right materials, and a commitment to safety, you can create a functional and impressive platform that elevates any performance. This isn’t just about hammering boards; it’s about crafting a focal point that brings your vision to life.
At a Glance: Your DIY Stage Checklist
- Plan Meticulously: Define purpose, measure accurately, sketch your design, and check local building codes.
- Prioritize Safety: Ensure structural integrity, clear exits, and secure electrical systems.
- Choose Wisely: Decide between a temporary or permanent stage based on your needs and budget.
- Gather Your Gear: Stock up on quality lumber, plywood, fasteners, and essential tools like a saw, drill, and level.
- Build Smart: Construct a robust frame, securely add flooring, and thoughtfully integrate lighting and sound.
- Finish Strong: Enhance aesthetics with paint or stain, and always include safety features like non-slip surfaces.
- Consider Pallets: Explore pallet stages for a cost-effective, adaptable, and surprisingly sturdy option.
Why Your Event Needs a DIY Stage (and Why You Can Build It)
Every great performance, speech, or presentation benefits from a focal point. A stage isn’t just a raised platform; it’s a statement, a natural amplifier for presence, and a clear demarcation for attention. Imagine your local band playing on a flat floor versus an elevated platform—the latter immediately commands more respect and visibility.
While professional stage rentals exist, they can be costly and lack the customizability that a DIY project offers. Building your own not only saves money but also allows for unique designs tailored specifically to your venue, audience, and artistic needs. From a backyard concert to a school play or a community fair, a custom-built stage adds professionalism and polish without breaking the bank. You don’t need to be a master carpenter to succeed; you just need a methodical approach and a willingness to learn.
Stage Your Success: The Art of Planning and Design
Before you even pick up a saw, the most critical step is thorough planning. Think of this as the blueprint for your masterpiece. A well-designed stage isn’t just about aesthetics; it’s about functionality, safety, and longevity.
Defining Your Stage’s Purpose
What will your stage be used for? This seemingly simple question guides every design decision.
- Live Performances: A band stage needs to accommodate musicians, instruments, amplifiers, and potentially a drum kit. Will there be dancing? How many people will be on stage at once? You might need a larger, more robust structure. You can Learn to build a band stage that stands up to lively performances.
- Public Speaking/Presentations: These stages often require less footprint but might prioritize a lectern, monitor space, and good sightlines for the audience.
- Theatrical Productions: These may need specific dimensions for props, backdrops, and actor movement, possibly even multiple levels.
- Outdoor Events: Weather resistance, portability, and quick setup/takedown become paramount. If you’re planning an outdoor event, you’ll need to Build Your Outdoor Stage with these elements in mind.
Your purpose dictates the required size, materials, and overall complexity.
Measuring Up: Space, Height, and Sightlines
Grab that tape measure and get specific. Accurately measure the stage area you have available. Consider:
- Length and Width: How much space do you have, and how much do you need for performers, equipment, and movement?
- Height: How high do you want the stage? A few inches might be enough for a small room, while larger venues or outdoor settings might require a higher platform for better visibility. Don’t forget ceiling height indoors!
- Audience Sightlines: Ensure everyone in the audience can see the stage comfortably without obstructions.
- Backstage/Side Space: Account for wing space, equipment storage, and easy performer access and exit.
Sketching Your Vision
Even a rough drawing on paper helps visualize the final product. Outline the basic shape, size, and any features like steps, ramps, or handrails. Think about the flow: how will performers get on and off? Where will equipment be positioned? A simple sketch can reveal potential issues before you start cutting lumber. For general inspiration on how to build a simple stage, you can explore resources that explain How to build a stage.
The Law of the Land: Researching Building Codes
This step is absolutely crucial, especially if your stage will be used for public events or in a commercial setting. Local building codes exist for safety reasons. They dictate things like:
- Minimum platform height requiring railings.
- Weight load capacity.
- Egress (exit) requirements.
- Ramp slopes and step dimensions.
- Electrical safety standards.
Non-compliance can lead to hefty fines, project delays, or, worse, safety hazards. Always check with your local municipality or building department. Even for personal use, understanding these codes can guide you in making a safer, more robust structure.
Choosing Your Core Materials
Your material choice impacts durability, weight capacity, and cost.
- Lumber: For the frame, select high-quality, straight lumber (e.g., 2x4s, 2x6s). For outdoor stages or high-humidity environments, pressure-treated wood is a must to resist rot and pests.
- Plywood or Decking: This forms the stage floor. Plywood (¾-inch minimum for good rigidity) is common. For outdoor use, consider treated decking boards for superior weather resistance and grip.
- Fasteners: You’ll need an assortment of screws, nails, and bolts. Screws offer superior holding power and are easier to remove if you need to disassemble the stage. For structural connections, consider lag bolts or carriage bolts.
- Bracing and Support: Depending on size and design, additional bracing materials like angled supports or metal connectors might be needed for enhanced stability.
For those looking to Build Your Own Stage Platform, selecting the right lumber and fasteners is paramount to ensuring a solid structure.
Budgeting for Brilliance
Set a realistic budget from the outset. Factor in not just materials but also tools (if you need to buy or rent them), safety gear, paint or stain, and any additional features like steps, ramps, or decorative elements. Remember, quality materials often save money in the long run by reducing repairs and increasing lifespan. You might find that looking into Easy DIY stage plans can help you identify cost-effective approaches without sacrificing stability.
Safety First: Non-Negotiable Considerations
A stage is only as good as its safety. Cutting corners here is simply not an option.
- Structural Integrity is King: The stage must be sturdy and solid, capable of supporting the combined weight of performers, equipment, and any dynamic movement without wobbling, creaking, or collapsing. This means robust framing, proper joist spacing, and secure connections.
- Clear Paths to Escape: Always provide at least two clear exits from any stage area, especially for public events. These paths should be unobstructed and easily accessible, critical for fire safety or emergency evacuations.
- Electrical Connections: Keep it Tidy and Dry: All electrical connections for lighting, sound, and instruments must be safely covered, insulated, and protected from water damage. Use appropriate outdoor-rated covers for exterior stages and ensure all power strips and extension cords are rated for the load and free from damage. GFCI (Ground Fault Circuit Interrupter) outlets are highly recommended.
Temporary vs. Permanent: Choosing Your Stage’s Destiny
The choice between a temporary and a permanent stage hinges on your long-term needs and the venue.
Temporary Stages: The Flexible Friend
Temporary stages are designed for portability and occasional use. They’re perfect for:
- Event-Specific Use: Festivals, school functions, pop-up markets.
- Rental Properties: Where permanent construction isn’t allowed.
- Evolving Needs: If your requirements might change over time.
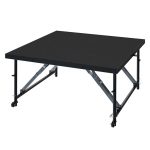
They typically use lightweight materials like plywood, particleboard, or MDF for the decking, making them easier to assemble and tear down. Modular designs are common, allowing for different configurations. For a straightforward approach, many find it helpful to Build your own stage using a temporary, modular design. If you need something that can be tucked away, you could even Build a DIY fold-out stage.
Permanent Stages: The Enduring Icon
Permanent stages are built for repeated, long-term use with minimal repairs. They are ideal for:
- Dedicated Venues: Theaters, community centers, worship halls.
- Heavy Use: Stages that will see daily or weekly activity.
These stages can incorporate more durable materials like hardwood, heavy-duty plywood, or even concrete slabs, designed to hold significantly more weight. They often integrate more complex features like built-in lighting grids, soundproofing, or permanent backdrops. If you’re planning for long-term use, How to build a stage permanently requires a more substantial investment in time and materials. When considering a robust structure, many guides provide excellent advice on How to build a stage.
Your Stage’s Toolkit: Materials & Equipment You’ll Need
Having the right materials and tools on hand before you start will make the construction process smoother and more efficient.
Essential Materials for General Stage Construction
- Lumber: As discussed, choose quality, straight lumber appropriate for the load and environment (e.g., 2x4s, 2x6s, 4x4s for legs). Pressure-treated wood is essential for outdoor elements.
- Plywood or Decking: ¾-inch CDX plywood is a common choice for flooring due to its strength and cost-effectiveness. For heavier loads or a smoother finish, consider sanded plywood or hardwood ply. Decking boards offer excellent outdoor durability and grip.
- Fasteners:
- Wood Screws: 2.5-inch to 3-inch exterior-grade screws (e.g., deck screws) for framing.
- Construction Adhesive: Provides extra bond strength to joints.
- Nails: For temporary tacking or specific applications where screws aren’t suitable.
- Bolts: Carriage bolts or lag bolts for critical structural connections (e.g., attaching legs to main frame).
- Bracing Materials: Plywood gussets, metal corner brackets, or angled wood pieces can add significant stability.
- Finishing Supplies: Paint, stain, non-slip coatings, and potentially carpet or an area rug.
If you’re looking to Build your own stage platform, make sure your materials list is comprehensive and aligned with your design. For modular or DIY compact wood stage plans, selecting lightweight yet strong materials is key.
Tools That Make the Job Easier
- Circular Saw: Your workhorse for cutting lumber and plywood quickly and accurately. A good quality blade makes all the difference.
- Power Drill/Driver: Essential for pilot holes and driving screws. Impact drivers are excellent for driving long screws with less effort.
- Measuring Tape: Don’t skimp on a good, sturdy tape measure. “Measure twice, cut once” is the carpenter’s golden rule.
- Level: A 2-foot or 4-foot level ensures your stage is perfectly flat and stable.
- Speed Square/Framing Square: For marking and checking 90-degree angles.
- Clamps: Essential for holding pieces together while you fasten them.
- Safety Gear:
- Safety Glasses/Goggles: Protect your eyes from sawdust and flying debris.
- Work Gloves: Prevent splinters and protect hands.
- Ear Protection: Crucial when using power tools for extended periods.
- Dust Mask: Important when cutting wood, especially MDF or particleboard.
Having these tools will enable you to effectively Build a Stage Platform with precision and confidence.
Building Block by Block: General Construction Steps
Now for the exciting part—bringing your plans to life!
1. Constructing the Foundation: The Frame
The frame is the skeleton of your stage, providing its strength and shape.
- Cut Lumber: Cut all your lumber pieces to the precise lengths specified in your design.
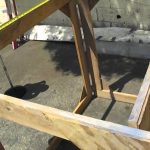
- Assemble the Base: Start by assembling the rectangular or square base frame. Use wood screws or bolts to create strong, rigid corners. Ensure the frame is perfectly square by measuring diagonals—they should be equal.
- Add Vertical Supports (Legs): Attach legs at each corner and at regular intervals along the frame, based on your design and desired height. For taller stages, brace the legs diagonally to prevent lateral movement.
- Incorporate Cross-Bracing: Crucial for stability, cross-bracing involves adding horizontal pieces between the main frame members and sometimes diagonal supports within the frame itself. This prevents racking and wobbling.
- Secure All Connections: Use plenty of screws or appropriate fasteners, ensuring every joint is solid.
2. Laying the Groundwork: Flooring and Supports
With the frame sturdy, it’s time to add the performance surface.
- Install Plywood/Decking: Lay your chosen flooring material (plywood, OSB, or decking) on top of the frame. Start from one corner and work your way across.
- Secure with Screws: Use plenty of screws (every 6-8 inches along joists and edges) to firmly attach the flooring to the frame. Countersink screws for a smooth surface.
- Add Support Beams: For larger stages or areas with heavy loads, add extra support beams (joists) underneath the flooring, running perpendicular to the main frame members. This distributes weight evenly and prevents sagging.
- Inspect for Stability: Once the flooring is down, thoroughly inspect the stage. Walk on it, jump lightly—does it feel solid? Does it wobble? Address any instability now before moving on. For those interested in Build your own stage platform, careful attention to joist spacing and subfloor attachment is critical.
3. Integrating the Tech: Lighting and Sound Equipment
A stage isn’t complete without the right technical setup. Plan this concurrently with your build.
- Assess Lighting Needs: Think about spotlights for performers, floodlights for general stage wash, and perhaps colored lighting for ambiance. LED fixtures are energy-efficient and offer a wide range of colors.
- Position for Optimal Coverage: Plan where your lights will be mounted (e.g., overhead truss, side stands) to ensure even coverage without harsh shadows.
- Wiring and Power Supply: Map out your electrical runs. Ensure you have enough power circuits and outlets. Use professional-grade cables and connectors, bundling them neatly and securely to prevent trip hazards. Consider a dedicated circuit for stage power if possible.
- Sound System Setup: Position speakers for optimal sound distribution, ensuring everyone in the audience hears clearly. Connect amplifiers, mixers, and microphones. Run all audio cables cleanly, securing them with cable ties or tape.
- Seamless Integration: Conceal cables where possible, either by running them under the stage, through conduits, or along edges where they won’t be seen or tripped over.
- Test and Calibrate: Before any event, thoroughly test all lighting and sound equipment. Calibrate levels, focus lights, and run through a sound check to ensure everything is working perfectly. You can discover how to Build Your Own Stage that’s ready for any setup.
4. The Grand Reveal: Adding Finishing Touches
The final steps elevate your DIY stage from a utilitarian platform to a polished performance space.
- Aesthetics and Protection: Apply paint or stain to the exposed wood. This not only enhances the stage’s appearance but also protects the wood from wear, moisture, and UV damage. For outdoor stages, use exterior-grade paint or stain.
- Safety Features:
- Non-Slip Surfaces: Apply non-slip paint, adhesive strips, or outdoor carpet to the stage surface, especially on steps and ramps, to prevent falls.
- Handrails: If your stage is significantly elevated or has steps, install sturdy handrails. These are often required by code for public spaces.
- Edge Protection: Add trim pieces to raw plywood edges for a cleaner look and to prevent splintering.
- Stage Signage & Branding: Incorporate custom banners, backdrops, or signage to brand your event or venue.
- Cable Management: Re-emphasize securing all cables. Use cable ramps or covers for any cables crossing walkways, and bundle cables neatly under or behind the stage.
- Aesthetic Enhancements: Consider adding stage skirting, curtains, or decorative elements that complement your event’s theme.
This comprehensive approach will not only help you Build a portable folding stage or any other type of stage but also ensure it’s ready for prime time.
The Pallet Stage Revolution: Cost-Effective & Adaptable
For those on a tight budget or needing a quick, temporary solution, the DIY pallet stage is a game-changer. It’s surprisingly sturdy, highly adaptable, and incredibly cost-effective. While often ideal for 1-3 musicians, it can be scaled up for larger needs.
What You’ll Need
- Materials:
- Pallets: The star of the show! Aim for pallets of the same height and thickness for a level base. Free ones can often be found behind businesses or on online marketplaces.
- Plywood or OSB Sheet: A thin sheet (¼ to ½-inch) to cover the top, creating a smooth, gap-free surface.
- Optional: Area rug, extra pallet slats (for filling gaps).
- Tools:
- Handheld Drill/Driver: For fastening.
- Hammer: For minor adjustments or nailing down slats.
- Saw (Miter or Circular): Useful if you need to cut pallets or plywood to size.
Building Your Pallet Stage: Step-by-Step
- Gather Your Resources: Collect enough pallets. Always check pallets for structural integrity, sharp edges, or chemical spills. Heat-treated (HT) pallets are generally safer than chemically treated (MB) ones.
- Frame It Up:
- Lay out your first layer of pallets. These form the primary support.
- Place a second layer of pallets on top, oriented perpendicularly to the first. This creates a staggered, strong foundation and spreads the load.
- Fasten both layers together securely using long wood screws. This is crucial to prevent shifting and create a unified, sturdy platform. If you’re building a Building your makeshift stage quickly, this two-layer approach provides excellent stability.
- Covering the Gaps:
- Pallets naturally have gaps. If your top layer has large gaps, fill them in with extra pallet slats, cut to fit and secured. This creates a more solid sub-surface.
- Lay your sheet of plywood or OSB over the entire top surface. This creates a smooth, flat, and hole-free performance area. Secure it firmly to the underlying pallets with screws. For a truly robust surface, consider using multiple layers of thinner plywood or decking with reclaimed pallet wood if cost is a major factor.
- Beautification (Optional):
- Drape an area rug over the entire stage. This instantly provides a finished, professional look, adds a bit of sound dampening, and further hides any imperfections.
Optional Enhancements for Pallet Stages
- Pallet-Wall Backer: Stack and secure pallets vertically behind the stage to create a simple, rustic backdrop.
- Crowd Barrier: Use a line of secured pallets in front of the stage as a basic crowd barrier.
- Lighting: Attach string lights, LED strips, or small spotlights directly to the pallet structure for ambient or functional lighting.
- Skirting: Add fabric skirting around the base of the pallet stage for a cleaner, more finished appearance.
Time & Cost Efficiency
A simple pallet stage can be a surprisingly quick project, often completed in a morning or afternoon. The cost can be incredibly low, especially if you source free pallets. Your main expenses might be fuel for pickup and the plywood/OSB sheet, potentially as low as $10-$23. For bands just starting out, learning to Learn to build a band stage this way can save significant funds.
Elevating the Experience: Advanced Tips & Creative Touches
Once you’ve mastered the basics of stage construction, consider these ideas to further enhance your platform.
- Modularity for Versatility: Design your stage in interlocking sections. This allows you to reconfigure its size and shape for different events, making it a truly versatile asset.
- Integrated Storage: For permanent stages, build in storage compartments underneath the platform for cables, props, or equipment.
- Ramps for Accessibility: Always consider accessibility. Ramps can be built with a gentle slope (typically 1:12 ratio) and handrails to accommodate wheelchairs and heavy equipment.
- Custom Backdrops & Curtains: A custom backdrop can dramatically change the feel of your stage. Simple tension rod curtains or projection screens can add professionalism.
- Weatherproofing for Outdoors: Beyond pressure-treated wood, consider sealing all exposed wood surfaces, using waterproof fabrics for skirting, and ensuring adequate drainage underneath the stage for outdoor setups.
- Portability Solutions: For temporary stages, add heavy-duty casters (wheels) to individual modules for easier transport. Look into designs that Build Your Own Stage with wheels or can be broken down into smaller, manageable pieces.
If you’re looking for solutions that easily break down and store, you might be interested in a design to Build a portable folding stage. For smaller, more intimate venues, a DIY compact wood stage plans could be the perfect fit.
Common Questions About Your DIY Stage
How high should a DIY stage be?
The ideal height depends on your purpose and audience. For intimate settings or small rooms, 6-12 inches might suffice. For larger audiences or performances, 18-36 inches provides better visibility. Always consider audience sightlines and ceiling height.
What’s the best wood for a stage floor?
For general DIY stages, ¾-inch CDX plywood is a popular choice due to its strength and cost. For a smoother, more durable finish, sanded plywood or even hardwood plywood can be used. For outdoor stages, pressure-treated lumber or composite decking offers superior weather resistance.
How do I make my stage portable?
To make a stage portable, design it in modular, interlocking sections that are small enough for one or two people to carry. Use strong but lightweight materials (e.g., aluminum framing, thinner but reinforced plywood). Adding heavy-duty casters to individual modules can also greatly increase portability.
Do I need railings for my stage?
For private, low-height stages, railings might be optional. However, for public events or stages exceeding a certain height (often 30 inches, check local codes), railings are typically required by building code for safety. It’s always a good idea to include them on elevated stages, especially if children or the elderly will be present.
How can I make my DIY stage look more professional?
Focus on clean lines, a smooth, unblemished surface (fill screw holes, sand well), and a fresh coat of paint or stain. Skirting around the base of the stage (fabric, plywood, or even pallet wood) hides the construction and makes it look much more finished. Good cable management, intentional lighting, and even a simple backdrop also contribute significantly.
Your Encore: Taking the Stage
Building a DIY stage is a rewarding project that combines practical craftsmanship with creative vision. By meticulously planning, prioritizing safety, choosing the right materials and tools, and following solid construction principles, you can create a platform that serves your needs for years to come. Whether it’s a simple pallet platform for a garage band or a more elaborate modular design for community events, the satisfaction of standing on a stage you built yourself is unmatched. So go ahead, measure twice, cut once, and prepare to elevate your next performance.

- How to Build a DIY Wood Fold Out Stage - May 29, 2026
- Building a DIY Stage for Your Next Performance - May 28, 2026
- Stage Construction Experts Deliver Custom Builds for Any Performance - May 27, 2026