Building your own performance platform doesn’t always mean constructing a behemoth for a stadium tour. Sometimes, the most impactful stage is a custom-fit, space-saving wonder. A DIY wood compact stage offers the perfect blend of functionality, cost-efficiency, and personal satisfaction, whether you’re creating a dedicated performance nook for a child, a portable display for craft fairs, or a small but mighty platform for intimate acoustic sessions. It’s about smart design, leveraging wood’s versatility, and crafting a space that’s just right for your needs.
At a Glance: Building Your Compact Wood Stage
- Tailor Your Stage: Understand the distinct needs for a fixed vs. modular compact stage, from a child’s corner platform to a portable event riser.
- Prioritize Safety: Learn how to assess load capacity (125-150 pounds per square foot static) and ensure structural integrity with proper framing and bracing.
- Select Smart Materials: Choose between standard 3/4″ plywood for decking and dimensional lumber like pine for frames, or consider lightweight options for portability.
- Master Construction Basics: Get step-by-step guidance on building frames, attaching decking, and creating secure, removable leg systems for modular designs.
- Ensure Stability: Discover techniques for leveling, cross-bracing for taller stages, and securing your platform to prevent wobbles and shifting.
- Optimize for Longevity: Learn practical tips for maintenance, smart storage, and enhancing durability with finishes and protective measures.
Why a DIY Wood Compact Stage? Beyond the Basics
Choosing to build a compact stage from wood isn’t just about saving money; it’s about gaining control over every aspect of your performance space. You dictate the dimensions, the aesthetic, and the functionality, ensuring it perfectly suits its intended use, whether that’s a whimsical corner stage for imaginative play or a sleek, professional platform for your next gig. Wood, as a material, is forgiving, readily available, and offers a warm, natural aesthetic that can be easily customized with paint or stain. This hands-on approach also demystifies the structure, making future modifications or repairs straightforward.
Pre-Flight Checklist: Planning Your Compact Platform
Before the first cut, a clear plan prevents headaches down the line. Defining your stage’s purpose and understanding its structural demands are paramount, even for a smaller build.
Pinpointing Purpose & Dimensions
The term “compact” is relative. For a child’s room, a 4×4 foot semi-circular stage might be perfect, fitting neatly into a corner. For an event, a series of 4×4 or 4×8 foot modular platforms offers manageability and flexibility. Consider:
- Who will use it? (Children, single performer, small ensemble, product display?)
- What activities? (Dancing, standing, sitting, displaying heavy items?)
- Where will it live? (Fixed in a room, moved between venues, stored in a garage?)
- How high does it need to be? Taller stages (over 30-40 inches) will require more robust stability measures like cross-bracing.
These questions will guide your dimensions and help you strike the right balance between “compact” and “functional.”
Understanding Load Bearing & Safety Factors
Even a compact stage needs to be robust. For general event use, aim for a static load capacity of 125-150 pounds per square foot (PSF). This provides a strong safety margin. Always factor in potential dynamic loads (people moving, jumping) and point loads (heavy equipment concentrated in a small area). Over-engineering slightly is always better than under-engineering, especially when safety is involved.
Material Choices for Wood: Strength Meets Portability
The beauty of a DIY wood compact stage lies in its material accessibility.
- Decking: 3/4-inch plywood is the industry standard for stage decking due to its excellent rigidity and strength. For ultra-portability, explore lightweight plywood options with multi-layer sandwich construction, which can be up to 40% lighter without sacrificing significant strength. Consider a non-slip finish like textured paint or grip tape for performer safety.
- Support Frame: Dimensional lumber, such as 2x4s or 2x6s, is cost-effective and easy to work with. Pine is a common choice. For stage legs, especially if they’ll see outdoor use or frequent handling, high-grade pressure-treated lumber or even aluminum framing offers superior resistance to elements and wear.
- Hardware: Quality hardware is crucial for both strength and ease of assembly. Use 1½” and 3″ wood screws for general construction. For modular stages, invest in components designed for tool-free or rapid assembly, such as carriage bolts with wingnuts for leg attachments or commercial-grade quick-release stage locks for connecting modules.
Building a Fixed Compact Stage: The Corner Performer’s Platform
Let’s walk through a practical example of a fixed, compact wooden stage, perfect for a child’s room or a small, dedicated performance area. This design, often built into a corner, maximizes space and creates a cozy, immersive environment.
Essential Supplies (for a 4-foot Corner Stage):
- Two 4’ x 4’ x ½” plywood sheets (can upgrade to 3/4″ for more robustness)
- Two 2×6” x 8’ pine boards
- One 5½” x 8’ cabinet backing board (or similar decorative fascia)
- 1½” and 3” wood screws
- Drill and appropriate bits
- Jigsaw
- Measuring tape, pencil, string
- Sandpaper or orbital sander
- Caulk, wood filler, primer, paint
Step-by-Step Construction:
- Frame the Foundation: From one 2x6x8’ pine board, cut one 48” piece and one 46½” piece. These will form the L-shaped perimeter of your stage.
- Assemble the “L”: Screw the 48” and 46½” boards together at a 90-degree angle using 3” wood screws. Ensure the shorter piece sits atop the longer one, creating an L-shape where each outside edge measures 48 inches. This forms the corner support.
- Attach the Decking: Place one 4×4’ plywood piece onto the top of this L-shaped frame, aligning two edges perfectly with the frame’s outside edges. Secure it with 1½” wood screws, driving them through the plywood into the pine frame.
- Shape the Front (Optional but Recommended): To create a classic semi-circular front, measure 48” of string. Tie one end to a pencil and nail the other end to the corner of the plywood where the two straight edges meet. Swing the pencil from one free side of the plywood to the other, drawing a perfect semi-circle.
- Cut and Refine: Carefully cut along your drawn semi-circle using a jigsaw. Take your time for a smooth line. Once cut, sand the edge thoroughly to remove splinters and create a finished look.
- Add Internal Supports: Cut the second 2x6x8’ pine board in half, yielding two 4-foot pieces. On one end of each of these pieces, cut a 15-degree angle.
- Position and Secure Internal Bracing: Position these angled boards under the plywood, radiating out from the corner. They should divide the stage area into three roughly equal sections, providing crucial support for the decking. Screw these internal boards together where they meet in the center, then screw the plywood down onto them with 1½” screws.
- Trim Flush: Use your jigsaw to cut the ends of these internal support boards flush with the semi-circular plywood edge. This creates a clean profile for the fascia.
- Install the Fascia: Cut the 5½” cabinet backing board into lengths that precisely cover each section of the semi-circular front edge. This adds a decorative finish and hides the internal supports. Screw the backing board onto the front of the stage using 1½” screws.
- Finishing Touches: Conceal any gaps with caulk and fill screw holes with wood filler. Once dry, sand smooth, then prime and paint the entire structure in your desired color.
This fixed corner stage offers a sturdy, integrated solution that transforms a room’s aesthetic.
Crafting a Modular Compact Stage: Portability & Flexibility
When your stage needs to move with you, modularity is key. A modular DIY wood compact stage breaks down into manageable sections, making transport and storage a breeze while still providing a robust platform.
Designing for Modularity:
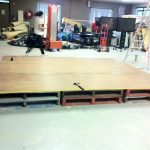
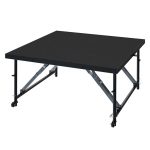
- Module Dimensions: Typically, modules are built in 4×4 ft or 4×8 ft sections. These dimensions align well with standard lumber and plywood sizes, minimizing waste and making them easy for one or two people to handle.
- Frame Construction: Each module requires its own frame. Construct these from 2×4 lumber for the perimeter. Crucially, add internal cross-bracing within each module. This minimizes deck deflection (sagging) and enhances the overall torsional rigidity, preventing twisting.
- Decking Attachment: Secure your 3/4-inch plywood decking to the frame using both construction adhesive and screws. This combination creates a “monocoque” effect, where the decking and frame act as a single, incredibly strong unit.
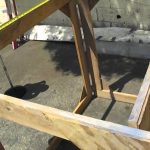
- Leg System: The Quick-Change Artist: For a compact, portable stage, removable legs are essential. Design a socket or sleeve system at each corner of the module frame. This could be a simple four-sided lumber box built into the frame or a metal sleeve. Removable leg posts (made from 4×4 lumber or round posts) then slide into these sockets. Secure them with a single carriage bolt and wingnut for rapid, tool-free setup and teardown.
- Module Connection: Seamless Integration: To create a larger stage from multiple modules, heavy-duty metal plates or interlocking clamps are vital. These secure adjacent frames horizontally, ensuring precise alignment, preventing any shifting during use, and maintaining a perfectly flush surface across the entire stage.
For a broader understanding of stage building principles and frameworks, you might find it helpful to refer to our comprehensive guide on how to Build your own performance stage.
Stability, Safety, and Longevity: Don’t Skip These Steps
Regardless of whether your DIY wood compact stage is fixed or modular, safety and durability are non-negotiable.
Location Preparation: The Foundation of Stability
- Level Surface: Always set up your stage on a level surface. For uneven ground, use leveling jacks at the base of your legs or sturdy wooden shims to create an even platform.
- Clear the Area: Remove all debris and obstacles.
- Assess Ground Capacity: Ensure the ground can bear the stage’s weight plus anticipated loads. For outdoor events on soft ground, reinforcing the area with plywood sheets can prevent legs from sinking.
Cross-Bracing: The Unsung Hero of Taller Stages
For any stage exceeding 30-40 inches in height, cross-bracing is absolutely critical. Diagonal cross-bracing, typically using aluminum tubing or specialized hardware, counters horizontal forces, prevents swaying, and significantly increases the stage’s dynamic live load capacity. Without it, even a compact stage can feel alarmingly unstable at height.
Leveling and Securing: No Wobbles Allowed
- Adjustable Feet: For maximum flexibility, especially on uneven floors, incorporate adjustable feet or leveling jacks at the base of your stage legs.
- Shims: For fixed-height legs, wooden shims are simple, effective tools to ensure even weight distribution and eliminate wobbles.
- Anchoring: For outdoor stages or stages in high-traffic areas, use anchors or weights to secure the stage to the ground. This is particularly important in windy conditions. Always reinforce all joints and connections with appropriate hardware.
Safety Compliance & Continuous Care
Adhere to local building codes and regulations, even for temporary structures. If you’re building for public use, conduct load tests to verify capacity. Always use clear signage for potential hazards, and consider installing portable stage platform railings for stages above a certain height or for vulnerable users (e.g., children). Regular inspections for wear, tear, or loose connections are paramount, and promptly repair or replace any damaged components.
Practical Playbook: Design Considerations & Smart Hacks
Elevate your diy wood compact stage with thoughtful design choices and clever solutions.
- Non-Slip Surface: A must-have. Apply textured paint or grip tape to the stage deck to prevent slips and falls, especially if performers are moving dynamically or if liquids might be present.
- Integrated Storage: For fixed compact stages in children’s rooms, consider building in cubbies or shelves underneath for toys, props, or costumes. For modular stages, design cases or racks for organized storage of disassembled components.
- Customizing Height: Think about interchangeable legs of different heights if your stage needs to adapt. A compact stage might be 12 inches for a dance platform but 24 inches for a presentation riser.
- Ease of Breakdown/Setup: When building modular components, prioritize hardware that facilitates quick assembly and disassembly. Wingnuts, quick-release pins, and interlocking clamps save immense time and effort. Labeling individual modules and legs can also streamline the setup process.
- Weather Protection: If your wood stage will be used outdoors, even temporarily, plan for weather-resistant covers. Consider sealing exposed wood surfaces to prolong their life.
- Lighting Integration: Build in simple channels or attachment points for LED strips or small spotlights to enhance the performance area without clutter.
Quick Answers to Common Compact Stage Questions
Q: How high can a compact wood stage be before I need cross-bracing?
A: For stability and safety, any stage exceeding 30-40 inches in height should incorporate diagonal cross-bracing to prevent swaying and enhance load capacity.
Q: Can I use thinner plywood than 3/4-inch for a compact stage to save weight?
A: While possible, 3/4-inch plywood is the standard for rigidity and strength, minimizing bounce and deflection. If weight is a primary concern, look for specialized lightweight plywood options designed for strength-to-weight ratio, but avoid anything less than 1/2-inch for stage decking. Always ensure adequate framing and cross-bracing compensate for any reduced deck thickness.
Q: What’s the best type of wood for outdoor stages?
A: For components that will be directly exposed to the ground or elements, such as legs, pressure-treated lumber (e.g., treated pine) offers superior resistance to rot and insects. For decking, exterior-grade plywood is essential, but it should still be sealed and ideally protected with covers when not in use.
Q: How do I make my stage truly “compact” for storage?
A: Focus on modular design with removable legs and components that disassemble into flat, stackable pieces (like 4×4 or 4×8 ft panels). Using quick-release hardware significantly aids rapid breakdown. Storing modules vertically on custom racks or dollies maximizes space efficiency.
Your Next Act: Building with Confidence
A DIY wood compact stage is more than just a platform; it’s an opportunity to create a custom-tailored space that supports your creative endeavors or enhances an event. By focusing on smart planning, robust construction techniques, and unwavering attention to safety, you can build a stage that is not only functional and aesthetically pleasing but also a testament to your craftsmanship. Take your time, enjoy the process, and prepare to elevate your next performance or display.

- DIY Wood Compact Stage Build Your Own Easy Performance Platform - May 31, 2026
- Simple DIY Portable Stage Solutions for Easy Event Setup - May 30, 2026
- How to Build a DIY Wood Fold Out Stage - May 29, 2026