Thinking about bringing live music, a stand-up routine, or even a graduation ceremony to your own backyard? The vision of a performance space often starts with the question: “how to build a stage?” Crafting a dedicated platform for backyard events offers incredible flexibility, a custom fit for your space, and the sheer satisfaction of a DIY project well done. It’s more than just a raised platform; it’s the foundation for memorable moments, and with the right approach, you can build one that’s both safe and spectacular.
At a Glance: Crafting Your Backyard Stage
- Strategic Planning is Key: Define purpose, measure accurately, and sketch your design before buying a single board.
- Material Matters: Select lumber and decking that stand up to weight, weather, and the test of time.
- Build from the Ground Up: Level your site meticulously and construct a robust, cross-braced frame for unwavering stability.
- Safety First, Always: Integrate handrails, non-slip surfaces, and smart cable management to protect performers and guests.
- The Power of Presentation: Don’t overlook skirting, lighting, and sound for a truly professional and immersive experience.
- Long-Term Reliability: Understand load capacities, conduct regular inspections, and prepare for proper maintenance or storage.
Laying the Foundation: Purpose, Place, and Blueprint
Before you even think about cutting wood, the real work begins with a solid plan. Building a stage isn’t just about assembling parts; it’s about engineering a safe and functional platform for its intended use. This initial phase dictates every subsequent decision, from the type of wood you buy to the height of your railings.
What’s the Show? Defining Your Stage’s Mission
What exactly will happen on your stage? A solo musician needs less space than a five-piece band. A speaker’s platform might be lower than a theatrical performance stage where the audience needs an unobstructed view. Identifying the primary purpose (live performances, public speaking, outdoor events) helps you determine critical factors like overall dimensions, platform height, and whether you need features like ramps or specific equipment mounts. For example, a stage for a DJ might require less depth but more access for power and cabling, while a yoga demonstration stage needs ample, clear floor space.
Sizing Up Your Space: Precision Measurements
Grab your tape measure and get specific. Accurately measuring your chosen stage location is paramount. Consider not just the footprint of the stage itself, but also surrounding space for audience, equipment, and performers’ entrances/exits. How high do you need it to be for optimal visibility without becoming a hazard? For a backyard stage, 12-24 inches off the ground is a common sweet spot – high enough for good sightlines but low enough to feel approachable and minimize fall risk. Remember to account for any uneven ground in your measurements.
Sketching Your Vision: The Design Blueprint
A detailed sketch is your project’s roadmap. This doesn’t need to be architectural-grade, but it should clearly illustrate the stage’s shape (most backyard stages are rectangular or square for simplicity), size, and desired features. Will it have steps, a ramp for accessibility, or perhaps a backdrop frame? Mark the placement of vertical supports (legs) and joists (crossbeams) for your frame. Think about modularity here, especially if you plan to disassemble and store it. A stage made of 4×8-foot sections is easier to manage than one massive structure.
Case Snippet: When building a stage for her neighborhood’s annual talent show, Maria started by sketching out a modular design using three 8×8 foot sections. This allowed her to assemble it quickly, transport it easily, and even configure it in different shapes for future events. Her sketch included not just the stage deck but also how the steps would attach and where the main support beams would run.
Before the First Cut: Local Regulations and Permits
This step is often overlooked in DIY projects but is critically important, especially if your stage will host public events or if it’s a permanent fixture. Check with your local municipality or homeowner’s association for any building codes, height restrictions, or permit requirements. While a small, temporary backyard stage might not need extensive permits, understanding local safety regulations for structures and public gatherings is always wise. It’s better to make a quick call than to face fines or, worse, safety issues later.
Material Choices that Last: Sturdiness Meets Weather-Resistance
Your material selection is foundational to the stage’s durability and safety. For backyard stages, you’ll typically be working with lumber and plywood, though aluminum modular systems are an option for portability.
- Structural Lumber: For outdoor stages, pressure-treated lumber (e.g., 2x4s, 2x6s, 4x4s) is highly recommended for its resistance to rot and insects. The dimensions you choose depend on your stage’s span and desired load capacity. For a typical backyard stage, 2x6s for joists spanning 4-6 feet and 4x4s for legs offer excellent stability.
- Flooring/Decking: ¾-inch exterior-grade plywood (like CDX) is a popular and cost-effective choice. It’s strong and provides a smooth surface. For even greater weather resistance and a premium look, consider composite decking planks, though these will add significantly to your budget.
- Fasteners: Use galvanized or exterior-grade screws (e.g., deck screws) and bolts to prevent rust and ensure strong connections. Screws offer a stronger hold than nails for structural elements and make disassembly easier if you’re building a portable stage. Carriage bolts with washers and nuts are excellent for securing legs to the frame.
Gathering Your Arsenal: Tools and Timeless Materials
Once your plan is locked in, it’s time to gather your resources. Having the right tools and materials on hand will make the construction process smoother, safer, and more efficient.
The Right Tools for a Smooth Build
Equipping yourself properly isn’t just about convenience; it’s about precision and safety.
- Cutting: A circular saw is indispensable for straight, accurate cuts on lumber and plywood. Consider a miter saw if you’re aiming for even greater precision on smaller cuts.
- Assembly: A powerful cordless drill with various drill bits (for pilot holes) and screwdriver bits (for deck screws) will save you immense time and effort.
- Leveling: A long bubble level (4-6 feet) is crucial for ensuring your stage is perfectly level, preventing wobbles and trip hazards. A smaller level is also handy for individual components.
- Measuring: A reliable measuring tape (25-30 feet) is obvious but critical for accuracy. A speed square or combination square helps with marking precise cut lines.
- Safety Gear: Never compromise on safety. Safety goggles, work gloves, ear protection, and sturdy protective footwear are non-negotiable.
Your Shopping List: From Frame to Finish
Beyond the main structural elements, a few other items are essential or highly recommended:
- Support Beams: Depending on your design, extra lumber for reinforcing the flooring.
- Additional Bracing: Plywood gussets or extra 2x4s for cross-bracing.
- Optional Additions:
- Handrails: For any elevated stage, especially if performers are moving around.
- Non-slip Surfaces: Sand-infused paint or adhesive strips, particularly important for outdoor stages exposed to dew or rain.
- Decorative Skirting/Fascia Panels: Fabric, thin plywood, or composite panels to hide the understructure and give a polished look. Magnetic skirting can be a quick and clean option.
- Ramps/Steps: Pre-made or materials to build them.
- Weather-resistant Covers: A tarp or custom cover for protection during storage or inclement weather.
- Finish: Exterior-grade paint or stain not only enhances aesthetics but also adds an extra layer of protection against the elements for your wooden components.
Mini-Example: Imagine building a sturdy wooden box. The 2x6s are the sides, the 4x4s are the legs, and the ¾-inch plywood is the top. Your exterior screws and bolts are the super-strong glue holding it all together.
From Ground Up: Site Prep and Frame Mastery
With your plan and materials in hand, it’s time to break ground – or at least, prepare it. The stability of your stage depends entirely on the preparation of your site and the integrity of your frame.
The Crucial First Step: Site Preparation
A perfectly level surface is the secret to a stable stage. Start by clearing the area of any rocks, debris, or roots. Then, meticulously level the ground. For minor unevenness, a shovel and tamper might suffice. For significant slopes or soft ground, you might need to lay down a layer of gravel, then top it with compacted sand, or use concrete pavers or solid blocks as footings under each leg, shimming as necessary. This creates a solid, uniform base that prevents future settling and wobbling.
Precision Cuts: Preparing Your Lumber
“Measure twice, cut once” is the golden rule here. Using your circular saw, cut all your lumber to the precise lengths specified in your design. Take your time. Even a slight discrepancy in leg length can lead to a wobbly stage. Label your cut pieces as you go – “side A,” “joist 1,” “leg front left” – to streamline assembly.
Building the Backbone: Assembling the Base and Frame
This is where your stage truly takes shape.
- Lay out the Perimeter: Start by laying out your cut perimeter boards on a flat surface, forming the main rectangle or square of your stage. Use your level to ensure everything is perfectly square before fastening.
- Attach Joists: Install your joists (crossbeams) at regular intervals (typically 16-24 inches on center) within the perimeter. These will support your flooring. Secure them using screws or joist hangers. Ensure they are flush with the top edge of your perimeter boards.
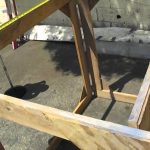
- Install Vertical Supports (Legs): Attach your pre-cut legs (e.g., 4x4s) to the corners and along the longer sides of your frame. Use strong carriage bolts for critical connections, drilling pilot holes first to prevent splitting. Ensure all legs are exactly the same height relative to your level ground.
- Add Cross-Bracing: This step is critical for preventing sway and ensuring a rock-solid stage. Attach diagonal cross-braces between your vertical supports, forming “X” shapes or triangles. These can be 2x4s or even plywood gussets at joints. Don’t skip this; it’s the difference between a bouncy platform and a truly stable stage.
If you’re looking for a wider perspective on various DIY stage configurations and advanced structural considerations, our main guide offers comprehensive insights into how to Build your DIY stage.
Securing Every Joint: Preventing Wobbly Stages
After assembling the frame, double-check every connection. Tighten all screws and bolts. Add extra fasteners where necessary, especially at high-stress points like leg-to-frame connections. A few extra screws now can prevent annoying wobbles and potential safety issues later. Ensure that no screw heads are protruding, as these can snag flooring or cause injury.
Decking it Out: Flooring, Support, and Access
With a robust frame in place, the next step is creating the stage surface and ensuring safe access. This phase turns the skeletal structure into a functional platform.
Laying the Deck: Your Stage’s Surface
This is the visible part of your stage, so precision here counts for both aesthetics and safety.
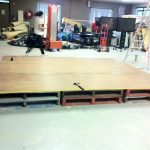
- Position Panels: Carefully place your plywood sheets or decking material on top of the frame. For plywood, ensure the edges are aligned with the joists where possible for maximum support.
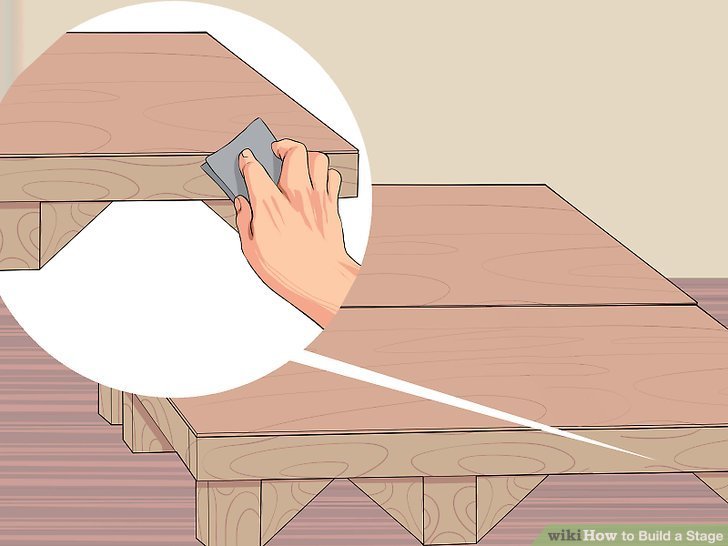
- Secure Flooring: Attach the flooring securely to every joist and perimeter board using exterior-grade screws. Countersink the screws slightly so their heads are flush with or just below the surface, preventing trip hazards. For a smooth finish, space screws evenly, typically every 6-8 inches along joists and edges.
- Expansion Gaps (if using decking): If you’re using individual decking boards, remember to leave small, consistent gaps between them (often a credit card’s width) to allow for wood expansion and drainage.
Underpinning Stability: Flooring Support Beams
Even with ¾-inch plywood, a large span between joists can lead to sagging under heavy loads. Install additional support beams (often 2x4s or 2x6s) directly beneath the stage flooring, running perpendicular to your main joists. These beams help distribute weight evenly across the entire frame, preventing weak spots and ensuring a truly solid surface, particularly crucial for stages hosting lively performances. Secure these beams firmly to the main frame and joists below the decking.
Smooth Entry and Exit: Ramps and Steps
If your stage is elevated, safe and accessible entry/exit points are non-negotiable.
- Steps: Construct steps using the same sturdy lumber as your frame. Aim for consistent riser heights (typically 7-8 inches) and tread depths (10-11 inches) for comfort and safety. Securely attach the step stringers to the main stage frame.
- Ramps: For accessibility, ramps are essential. ADA guidelines suggest a maximum slope of 1:12 (meaning for every 12 inches of run, you rise 1 inch). This requires a long ramp for even a moderately elevated stage. Ensure the ramp surface is non-slip and includes handrails if the rise is significant. Integrate ramps seamlessly into the stage structure for maximum stability.
The Finishing Touches: Safety, Style, and Sound
Once the main structure is complete, it’s time to focus on refining the stage for optimal safety, visual appeal, and technical readiness. These details elevate a basic platform to a professional-looking performance space.
Safety First: Guardrails and Non-Slip Surfaces
Protecting performers and audience members should always be a top priority.
- Handrails: For any stage elevated more than 24-30 inches, or if your local codes require it, sturdy handrails are a must. Install them along the perimeter of the stage and on any ramps or steps. Ensure they are rigidly attached to the stage frame, not just the decking, and can withstand a reasonable amount of force.
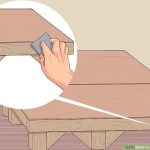
- Non-Slip Surfaces: Even on a dry day, a smooth stage surface can become slippery with spilled drinks or wet shoes. Apply non-slip coatings (like paint with added sand) or adhesive non-slip strips to the stage floor, particularly on steps and ramps. This simple addition can prevent serious accidents.
Beyond Basic: Aesthetics and Professionalism
A stage isn’t just about functionality; it’s about presentation.
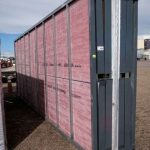
- Skirting/Fascia Panels: These panels conceal the rough understructure, cables, and storage areas beneath the stage, giving it a clean, professional appearance. You can use fabric (easily stapled or attached with Velcro), thin plywood, or even decorative lattice. Magnetic skirting offers a quick, tool-free setup and takedown.
- Cable Management: Cables for microphones, instruments, lighting, and power can quickly become a tripping hazard. Use cable ties, clips, or dedicated cable channels to organize and secure all wiring. Run cables along the edges of the stage or through discreet openings to keep the performance area clear.
- Applying a Finish: A coat of exterior-grade paint or stain will protect your wood from the elements (especially crucial for outdoor stages) and allow you to customize the look. Darker colors tend to minimize visible scuffs and dirt.
- Decorative Elements: Consider adding a backdrop frame for banners, curtains, or signage. This provides visual interest and can help define the performance space.
Bringing it to Life: Lighting and Sound Integration
While not strictly “building” the stage, integrating lighting and sound is vital for its functionality.
- Assess Needs: Determine your lighting (spotlights, colored LEDs, ambient) and sound system (speakers, microphones, mixer) requirements based on the event type and audience size. For a backyard, a few PAR lights and a couple of powered speakers might be sufficient.
- Strategic Positioning: Plan where lights will be mounted (e.g., on a backdrop truss, ground level) for optimal illumination without blinding performers or audience. Position speakers for even sound distribution.
- Power and Wiring: Layout your wiring plan for power sources. Use heavy-duty, outdoor-rated extension cords and power strips. Ensure all connections are secure and protected from moisture. For backyard stages, often a single heavy-duty outdoor-rated extension cord from a dedicated circuit is sufficient, but consider a small generator if power access is an issue.
- Testing: Before any performance, thoroughly test all lighting effects and sound components. Adjust levels, angles, and colors to create the desired ambiance and ensure everything works seamlessly.
Ensuring Longevity: Load Tests, Maintenance, and Troubleshooting
Your stage is built, but its story isn’t over. Ensuring its safety, prolonging its life, and knowing how to address common issues are crucial for years of successful performances.
The Ultimate Test: Verifying Load Capacity
Before anyone steps onto your stage, it’s vital to ensure it can handle the intended weight. This isn’t just for safety; it’s for peace of mind.
- Static Load Test: Place heavy, distributed weights (e.g., sandbags, concrete blocks) across the stage surface, simulating the weight of performers and equipment. Observe for any bowing, creaking, or instability.
- Dynamic Load Test: Have a few people (representing the number of performers) move around, jump lightly, and simulate performance movements. The stage should feel solid with minimal bounce or sway. If it feels shaky, you need to add more bracing or support.
Staying Compliant: Beyond the Build
Revisit any local building codes or regulations you identified in the planning phase. Ensure your stage meets all safety requirements, especially if it’s for public use. Have a basic first aid kit on hand and communicate any potential hazards (e.g., step locations, cable runs) with clear signage.
Common Roadblocks & Quick Fixes
Even with the best planning, issues can arise. Knowing how to troubleshoot helps.
- Unstable Stage: If the stage wobbles, check individual leg connections first. Are all bolts tight? Is the ground perfectly level under each leg? Add or reinforce cross-bracing.
- Squeaky Decking: Squeaks often come from loose screws or wood rubbing against wood. Try tightening screws, adding more screws along joists, or, for persistent squeaks, removing the offending board and adding shims or construction adhesive to the joists before reattaching.
- Uneven Ground: For slight unevenness that emerges over time, use composite shims or thin pieces of treated plywood under specific leg bases to re-level.
- Damaged Components: Periodically inspect for cracked lumber or loose fasteners. Promptly repair or replace any damaged parts to prevent further issues.
Keeping It Prime: Maintenance and Storage Tips
For a stage that lasts, regular care is essential.
- Cleaning: Regularly sweep the stage clean. For tougher grime, use a mild detergent and water, then rinse thoroughly.
- Inspection: Before and after each use, perform a quick visual inspection. Check for loose screws, splintered wood, or any signs of structural fatigue.
- Protection: For outdoor stages, consider covering the stage with a heavy-duty tarp when not in use, especially during extended periods of rain or harsh sun. This significantly extends the life of your wood and finish.
- Proper Storage (for portable stages): If your stage is modular, disassemble it carefully. Store components in a dry, well-ventilated area, preferably stacked on dunnage (small pieces of wood to keep them off the ground) to prevent moisture damage and warping. Labeling components makes reassembly much faster.
Quick Answers: Your Pressing Stage Building Questions
Here are some common questions about building a DIY stage for backyard events:
Q: How high should a backyard stage be?
A: For backyard performances, a stage height of 12-24 inches (30-60 cm) is generally ideal. This provides good visibility for the audience without being excessively high, which simplifies access and reduces fall risk. Taller stages (24+ inches) may require handrails and more robust steps or ramps.
Q: What’s the best wood for an outdoor stage?
A: Pressure-treated lumber (e.g., pine, fir) is highly recommended for the structural frame of an outdoor stage due to its resistance to rot, decay, and insects. For the decking surface, ¾-inch exterior-grade plywood (CDX) or weather-resistant composite decking are excellent choices.
Q: Can I build a stage on uneven ground?
A: Yes, but you must level the ground first. This is crucial for stability. You can level the area by clearing debris, digging down high spots, adding compacted gravel or sand to low spots, or using concrete pavers or sturdy leveling blocks under each leg, shimming as needed. Never build directly on significantly uneven ground without preparation.
Q: How do I make my DIY stage safe?
A: Prioritize safety by: using sturdy, weather-resistant materials; building a robust, cross-braced frame; ensuring the stage is perfectly level; installing handrails for elevated stages; applying non-slip surfaces to the deck and steps; and managing all cables to prevent tripping hazards. Always perform a load test before use.
Q: How much weight can a DIY stage hold?
A: The weight capacity of your DIY stage depends entirely on its design, material dimensions (e.g., joist size, spacing, leg type), and construction quality. A properly built stage using 2×6 joists on 16-inch centers with sturdy legs can typically support hundreds of pounds per square foot. Always over-engineer for safety, and conduct load tests to verify capacity.
Your Next Act: Building Your Backyard Stage
Building a stage, especially for your own backyard events, is a deeply rewarding project. It’s an investment in countless future memories, whether it’s a child’s puppet show, a local band’s debut, or a meaningful family celebration. By meticulously planning, choosing the right materials, constructing a stable frame, and focusing on safety and aesthetics, you’re not just building a platform—you’re crafting a focal point for connection and creativity. Take your time, enjoy the process, and soon you’ll have a stage ready for its spotlight moment.

- How to Make a Stage for Events or Performances - June 2, 2026
- How to Build a Stage for Backyard Performances or Events - June 1, 2026
- DIY Wood Compact Stage Build Your Own Easy Performance Platform - May 31, 2026