The dream of commanding an audience, whether for a band, a speaker, or a community event, often starts with a single, crucial element: the stage. Far more than just a raised platform, constructing a stage is about building a foundation for performance, ensuring safety, stability, and aesthetic appeal. It’s a hands-on project that empowers you to create the very space where memories are made and voices are heard. This guide dives deep into the practicalities, decisions, and expert tips for building a sturdy, reliable performance platform that will stand the test of time and talent.
At a Glance: Your Stage Construction Blueprint
- Strategic Planning: Understand your stage’s purpose, measure accurately, and sketch a detailed design to avoid costly errors.
- Material Mastery: Select the right lumber, flooring, and fasteners for durability, weight capacity, and environmental resilience.
- Frame First: Build a level, square, and strongly braced frame as the non-negotiable backbone of your stage.
- Floor & Support Logic: Install robust flooring with adequate sub-support to distribute weight evenly and prevent flex.
- Finishing with Purpose: Integrate safety features, accessibility, and aesthetic touches that enhance both form and function.
- Safety & Codes: Always consider local building codes and safety standards, especially for public use.
Laying the Groundwork: Smart Planning for Your Performance Platform
Before the first cut of lumber, a well-thought-out plan is your most valuable tool when constructing a stage. This initial phase dictates everything from material choices to the structural integrity of your final platform. Rushing through it often leads to frustration, rework, and potential safety hazards.
Defining Your Stage’s Purpose and Place
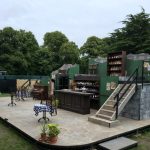
Start by pinpointing why you need a stage. Is it for a garage band’s practice space, a school’s annual play, an outdoor festival, or a public speaker’s podium? Each purpose has unique demands. A small, indoor speaking platform will have different height and load requirements than a large outdoor concert stage. Consider also whether it’s permanent or temporary; modular designs work best for stages that need to be assembled and disassembled.
Critical Measurements and Sketching Your Vision
Grab your tape measure and get precise. Document the exact dimensions of your available space: length, width, and desired height. Account for audience sightlines, backstage areas, and any equipment placement. Think about traffic flow on and off the stage. A detailed sketch, even a rough one, will help visualize steps, ramps, handrails, and any unique shapes or multi-level designs. Don’t forget to mark where structural supports will go.
Navigating Codes and Choosing the Right Materials
For any stage, especially those intended for public use, researching local building codes is non-negotiable. These codes cover crucial aspects like live load capacity (how much weight the stage must safely hold per square foot), egress requirements (safe exit paths), and railing heights. Failing to comply can lead to fines, project delays, or, worse, safety incidents.
When it comes to materials, prioritize durability and weight capacity. Pressure-treated lumber is essential for outdoor stages exposed to the elements, preventing rot and insect damage. For the stage surface, 3/4-inch plywood (CDX grade or better) or composite decking offers excellent stability. Fasteners—screws, bolts, and connectors—must be rated for the load and material type. Budgeting for quality materials here is an investment in safety and longevity.
Assembling Your Toolkit and Supplies
Having the right tools and materials on hand before you begin significantly streamlines the construction process, ensuring efficiency and safety. Don’t underestimate the value of organization.
Must-Have Materials for a Rock-Solid Foundation
Your material list will depend on your design, but these are the core components:
- Lumber: Typically 2x4s, 2x6s, or 2x8s for framing, depending on the span and height. Longer spans or heavier loads require thicker lumber (e.g., 2x8s for spans over 8 feet).
- Decking/Flooring: 3/4-inch plywood (often CDX or marine grade for outdoors) is standard. For a more finished or weather-resistant surface, consider composite decking.
- Fasteners: High-quality exterior-grade screws (e.g., structural screws, decking screws) are preferred over nails for stronger, longer-lasting connections. Use lag screws for heavy-duty connections.
- Bracing Material: Smaller lumber (e.g., 1x4s or scrap plywood) for cross-bracing.
- Finishing: Paint, stain, or sealer for protection and aesthetics.
- Optional: Materials for ramps, steps (treads, risers), handrails, and stage skirting (fabric, plywood).
Essential Tools for Precision and Safety
Precision is key in stage construction. These tools ensure accuracy and make the job safer:
- Circular Saw: For efficient and accurate cuts of lumber and plywood. Consider a miter saw for perfect 90-degree and angled cuts.
- Drill/Impact Driver: Essential for pre-drilling holes and driving fasteners quickly and securely.
- Measuring Tape: A reliable, long tape for all dimensions.
- Level: A 4-foot level is ideal for checking plumb and level across longer sections, ensuring your stage isn’t crooked.
- Framing Square: To ensure all your corners are perfectly square.
- Safety Gear: Non-negotiable! Safety glasses, hearing protection, work gloves, and steel-toed boots.
- Optional: Clamps, saw horses, speed square, chalk line.
Engineering the Core: Building a Stable Stage Frame
The frame is the skeleton of your stage. Its stability and strength are paramount, directly impacting the safety and longevity of your entire structure. This is where meticulous execution truly pays off.
Precision Cuts and a Level Base
Start by cutting your lumber to the specified lengths from your design sketch. Accuracy here prevents gaps and structural weaknesses. Lay out the perimeter pieces on your chosen site. Using your level, ensure that every part of this base frame is perfectly level and square before fastening. Even a slight tilt can compromise stability once weight is applied. Use a framing square to verify all corners are at a true 90 degrees.
Vertical Supports and Bracing for Unyielding Strength
Once the base is level and square, install vertical supports (legs) at regular intervals. For most DIY stages, spacing them every 2-4 feet is a good rule of thumb, but consult your design and local codes. Secure these supports to the base frame using screws or bolts, ensuring they are plumb (perfectly vertical). These supports carry the vertical load.
To prevent the stage from swaying or “racking” under lateral forces (people moving, equipment shifting), cross-bracing is crucial. Add diagonal braces between vertical supports, forming triangles. Triangles are inherently strong and will significantly stiffen your structure. You can use smaller lumber or even plywood gussets for this. Double-check all connections for tightness and stability.
If you’re looking for more comprehensive details on general construction techniques that apply to a wide range of DIY projects, including the broader context of various stage designs and materials, you can explore the Full DIY stage guide for additional insights.
The Decking and Underpinnings: Creating the Performance Surface
With a solid frame in place, the next step is to create the actual performance surface and ensure it can handle the anticipated load without flexing or bouncing.
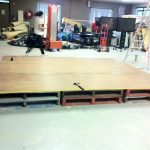
Laying the Floor: Securing Your Performance Canvas
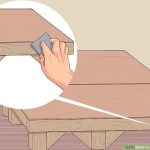
Lay your plywood or decking sheets onto the frame. It’s best practice to stagger the seams of the plywood sheets, like brickwork, to increase overall rigidity and distribute stress more effectively. Use plenty of screws (every 6-8 inches along joists and perimeter) to securely fasten the flooring to the frame. Pre-drilling pilot holes, especially near edges, can prevent wood splitting. This meticulous fastening also helps prevent future squeaks.
Reinforcing the Load: Strategic Support Beams
Even with sturdy flooring, adequate support beneath is vital. Install additional support beams (joists) parallel to the shorter side of your stage frame, typically spaced 16 to 24 inches on center. These joists provide critical reinforcement for the flooring, distributing weight evenly across the entire surface and preventing localized deflection or sagging. For stages expecting heavy loads, like drum kits or heavy sound equipment, closer joist spacing or thicker lumber may be necessary.
Thoughtful Access: Ramps, Steps, and Handrails
If your stage is elevated, safe access is paramount.
- Steps: Design steps with consistent rise and run (e.g., 7-inch rise, 11-inch run) for comfortable and safe climbing. Securely attach risers and treads to the stage frame or a separate stringer system.
- Ramps: Ramps must have a gentle slope (often 1:12 ratio for accessibility, meaning 1 inch of rise for every 12 inches of run) and be wide enough for comfortable passage. Use non-slip surfaces on both steps and ramps.
- Handrails: For any elevated platform or steps, handrails are often required by code and always a good safety measure. Ensure they are sturdy and at a comfortable height (typically 34-38 inches).
Beyond the Structure: Integrating Light, Sound, and Polish
A truly functional stage goes beyond its raw structure. Thoughtful integration of utilities and finishing touches elevates a bare platform into a dynamic performance space.
Powering the Performance: Smart Lighting and Sound Integration
While installing complex lighting and sound systems often requires specialist knowledge, your stage construction should plan for them. Think about:
- Wiring Pathways: If power is needed on stage, plan for conduits or channels within the frame for safe, hidden electrical wiring.
- Mounting Points: Integrate reinforced blocking or mounting plates into the frame where you anticipate attaching heavy lighting fixtures, speakers, or backdrops.
- Power Access: Consider where performers or technicians will need access to outlets and plan for power strips or integrated power boxes that can be safely secured.
- Cable Management: Even at the construction phase, think about how cables will be routed to prevent trip hazards. Cut-outs in the stage floor or skirting can help.
The Finishing Touches: Aesthetics, Safety, and Accessibility
These final details transform your functional structure into a polished performance venue.
- Paint or Stain: Apply a durable paint or stain to the stage surface and frame for aesthetics and protection. For outdoor stages, weather-resistant paint or deck stain is crucial. A non-glare finish on the stage floor can also be beneficial for performers under bright lights.
- Safety Features: Reiterate non-slip surfaces on all walking areas. For edges, consider adding corner guards to protect the wood and prevent scrapes.
- Stage Skirting: Attaching decorative skirting around the base of the stage (e.g., fabric, thin plywood, or corrugated plastic) creates a clean, professional look and hides the structural elements beneath. Use Velcro, snaps, or small clips for easy removal if access is needed.
- Accessibility Features: Beyond ramps, consider ensuring clear pathways to the stage, designated accessible seating areas, and adequate space for mobility devices if your stage is for public use.
Practical Playbook: Your Stage Construction Checklist
Use this checklist as you move through your project to keep things on track and ensure you don’t miss any critical steps.
- Planning Phase:
- Defined stage purpose clearly.
- Measured entire space precisely.
- Created detailed design sketch (including access).
- Researched and understood local building codes.
- Selected all materials, ensuring suitability and quality.
- Set and allocated budget.
- Preparation Phase:
- Acquired all lumber, flooring, fasteners, and finishing materials.
- Gathered all necessary tools and safety gear.
- Frame Construction:
- Cut all frame lumber to precise lengths.
- Assembled and leveled the base frame, ensuring it’s square.
- Installed and secured all vertical supports (legs).
- Added cross-bracing for lateral stability.
- Double-checked all frame connections for tightness.
- Flooring & Support:
- Installed flooring, staggering seams and using adequate fasteners.
- Added support beams (joists) beneath flooring for reinforcement.
- Constructed and secured any ramps and steps with non-slip surfaces.
- Installed handrails where needed.
- Performed stability tests; made adjustments if necessary.
- Finishing & Integration:
- Planned for lighting and sound wiring/mounting points.
- Applied paint, stain, or protective finish.
- Added non-slip treatments and edge protection.
- Installed stage skirting for a professional look.
- Organized and secured all cables.
- Conducted a final safety inspection.
Quick Answers: Your Stage Building FAQs
How high should a DIY stage be?
The ideal stage height depends entirely on its purpose and audience. For intimate performances or small venues, 6-12 inches might suffice. For larger audiences or better visibility in bigger spaces, 18-30 inches is common. Remember, stages over a certain height (often 30 inches, but check local codes) typically require guardrails and more stringent engineering.
What’s the best wood for a stage?
For the frame, dimensional lumber like 2×6 or 2×8 pressure-treated pine (for outdoor stages) or untreated fir/spruce (for indoor stages) is standard. For the deck, 3/4-inch plywood (CDX or better) is a cost-effective and strong choice. For a more durable or aesthetically pleasing surface, consider composite decking or hardwood plywood.
How do I make my stage portable or modular?
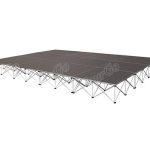
To make a stage portable, design it in smaller, interlocking sections or modules. Use heavy-duty, removable bolts or specialized stage hardware (like cam-locks) to connect modules. Legs can be designed to detach for easier transport. Focus on lighter materials where possible without sacrificing structural integrity.
What safety checks are crucial after constructing a stage?
Before anyone uses the stage, perform a “live load” test by having several people stand and walk around on it, checking for any undue flexing, wobbling, or creaking. Inspect all fasteners, connections, and bracing. Ensure all walking surfaces are non-slip, and handrails are secure. Review the stage against your initial design and local safety codes one last time.
Building your own stage is a rewarding endeavor that culminates in a custom-built platform perfectly suited for your needs. By meticulously planning, selecting quality materials, and executing each construction step with care, you’ll create a sturdy, safe, and professional-looking performance space. Take your time, prioritize safety, and enjoy the satisfaction of seeing your vision come to life.

- Constructing A Stage Builds Your Own Sturdy Performance Platform - June 5, 2026
- DIY Stage Platform Construction Is Easy for Any Event - June 4, 2026
- Simple DIY Portable Folding Stage Ideas for Events - June 3, 2026