Need a performance space that won’t break the bank or your back? Crafting a simple DIY portable stage is often the smartest move for artists, event planners, and community organizers. Forget the hassle and expense of rentals; building your own gives you total control, adapts to any venue, and can be surprisingly quick to set up and tear down.
This guide zeroes in on practical, budget-friendly strategies and smart techniques for building a portable stage that’s sturdy, versatile, and, most importantly, easy to manage. We’ll show you how to choose the right materials, streamline your setup, and ensure safety without needing a specialized construction crew.
At a Glance: Simple DIY Portable Stage Solutions
- Cost-Effective Alternatives: Discover how everyday items like school tables, milk crates, and shipping pallets can form the foundation of a robust stage.
- Streamlined Setup: Learn modular design principles and tool-free assembly tricks to minimize setup time, aiming for under 30 minutes with a small team.
- Prioritize Safety: Understand essential safety measures, from proper load-bearing to guardrail requirements, ensuring performer and audience well-being.
- Smart Storage & Transport: Get tips for efficient disassembly, protection, and organized storage to prolong your stage’s lifespan.
- Quick Troubleshooting: Address common issues like instability or uneven surfaces with practical, on-the-spot solutions.
Laying the Groundwork: Why “Simple” Matters for Portability
Before diving into blueprints, let’s nail down what “simple” truly means for a portable stage. It’s about optimizing for ease of transport, quick assembly, and minimal tools, all while maintaining structural integrity. This approach directly tackles the common pain points of traditional staging: cost, complexity, and sheer bulk.
Choosing simple methods means you’re investing less time and money upfront, allowing you to reallocate resources to other event needs. It also translates to greater flexibility, as your stage can adapt to various spaces, from a park to a community hall. The secret lies in smart material choices and a modular mindset.
Your Budget-Friendly Stage Foundations
You don’t need a massive budget to build a functional and respectable stage. Many effective portable stage solutions leverage readily available, often free or low-cost, materials. These methods prioritize simplicity, making them ideal for DIYers.
Repurposing School Tables for Instant Elevation
Old school tables, especially the rectangular cafeteria variety, are surprisingly effective. Their sturdy frames offer a solid base.
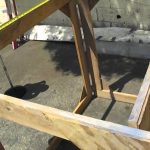
- The Build: Determine your desired stage height, then carefully cut the table legs using an angle grinder. For added stability, tape the legs together where they meet with strong electrical tape.
- Finishing Touch: Cover the top with old carpet or a durable fabric. This not only improves aesthetics but also provides a non-slip surface and dampens sound. This method is exceptionally quick for creating smaller platforms or stage extensions.
Ingenious Drum Risers from Shipping Crates
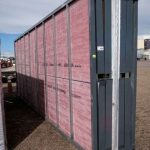
Need a compact riser for a drum kit or a solo performer? Air conditioner shipping crates are often robust and perfectly sized.
- The Build: Acquire a sturdy wooden air conditioner shipping crate. Often, chopping it in half provides two risers of a manageable height.
- The Surface: Secure a piece of particle board or plywood on top to create a smooth, solid performing surface. This yields a surprisingly strong and compact platform.
Building Broad Stages with Shipping Pallets
Shipping pallets are a DIY favorite for a reason: they’re often free and incredibly versatile. They can form the base for larger stages.
- Sourcing: Check local classifieds, construction sites, or even ask businesses receiving large shipments. Always inspect pallets for damage or chemical treatments.
- Assembly: Arrange pallets to your desired footprint. For a solid, even surface, place “Yellow Tongue” flooring sheets securely on top. These interlocking sheets provide an excellent, stable deck that can be easily covered. For an even more comprehensive understanding of stage construction, including design principles and material considerations, you might want to explore the comprehensive guide on how to Build your own stage.
Milk Crate Magic: Stackable, Customizable Staging
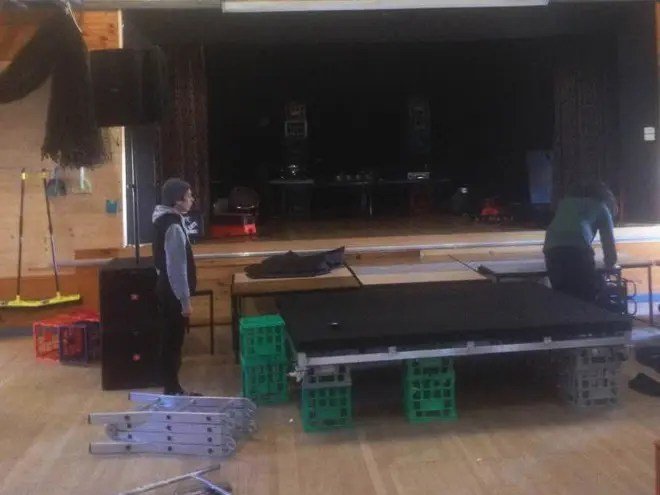
Milk crates are the unsung heroes of simple, modular staging. They’re light, stackable, and surprisingly strong.
- Sourcing: Look for free old milk crates from local milk factories, supermarkets, or recycling centers.
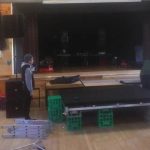
- Construction: Zip-tie the crates together for a unified, stable base. For a single-height stage, arrange them as desired.
- Adding Height: If you need a higher stage, use two layers of zip-tied crates.
- The Top: Lay sturdy timber planks or plywood sheets across the top, ensuring they cover the entire surface and are secured. Cover with rugs or fabric for a finished look and to prevent slips. This method is incredibly adaptable and perfect for stages that need to be reconfigured often.
Engineering for Speed: Planning a Rapid-Deploy Stage
The goal for any simple DIY portable stage is minimal setup time. This isn’t just about having the right materials; it’s about smart planning and choosing systems that are inherently fast to assemble.
Prioritizing Modular Design & Tool-Free Assembly
Modern portable stages, even DIY versions, benefit immensely from modular thinking.
- Interlocking Decks: Look for (or design) decks that slot or lock into each other without complex fasteners. This could be as simple as strategically placed cleats or cam locks.
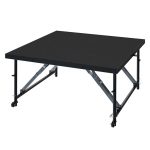
- Lightweight Frames: Aluminum frames are ideal for commercial systems due to their strength-to-weight ratio, but for DIY, consider lighter wood constructions that can be easily lifted by one or two people.
- Telescopic or Folding Legs: These are game-changers for quick height adjustment and compact storage. If building from scratch, design legs that can be quickly pinned or clamped at various heights.
- Accessories: Think “clip-on” for everything: safety rails, steps, and skirting. Pre-fabricate these so they attach in seconds.
Essential Tools and Prep for Fast Setup
Speed isn’t just about the stage itself; it’s about the workflow.
- Stage Transport Trolleys: A simple furniture dolly or a custom-built trolley can shave significant time off transport from storage to setup area.
- Leg Storage Racks: Keep legs organized by height or type.
- Pre-Labeled Components: Label every piece—legs, decks, rails—with clear numbers or color codes. This eliminates guesswork.
- Layout Diagrams: A simple printed diagram showing the stage footprint and where each component goes drastically speeds up crew assembly, especially for a multi-person team.
- Safety Gear: Don’t let safety slow you down. Have gloves, goggles, and protective footwear readily available before starting assembly.
The 6-Step Blueprint for Quick Stage Assembly
Even with a simple DIY portable stage, a systematic approach ensures efficiency and safety. Aim for a methodical, almost choreographed, setup.
- Lay Out and Mark the Area (3-5 Minutes):
- Action: Clear all obstacles. Use tape or chalk to mark the precise footprint of your stage.
- Pro Tip: Organize all stage components by type (decks, legs, rails) within reach but not obstructing the footprint. Use your printed layout guide as a reference.
- Start with Legs or Frames (5-7 Minutes):
- Action: Begin installing the legs. If using modular folding frames, unfold and position them.
- Precision: Crucially, set all leg heights uniformly from the start. Many modern systems have height indicators or push-button mechanisms for this. An uneven base is the enemy of stability.
- Secure the Deck Panels (7-10 Minutes):
- Action: Lift each platform panel and align it with the leg fixtures or frame. Slide or lock it into place.
- Verify: After every two panels, give them a gentle push and wiggle. Ensure they are fully clicked, latched, or screwed into place. Any movement now will amplify later.
- Add Safety Features (5 Minutes):
- Action: Install guardrails, especially if your stage height exceeds 300mm (12 inches)—this is often a safety mandate. Secure steps firmly, adding anti-slip pads.
- Finish: Attach skirting or edging. This not only looks professional but also prevents trip hazards by concealing the understructure. Many systems allow for tool-less handrail clamps.
- Enhance with Accessories:
- Action: Beyond safety, think about function. Install sturdy handrails for steps. If outdoors, consider a weather-resistant cover.
- Integration: Plan for lighting (spotlights, LED strips) and audio equipment (speakers, microphones). Truss systems, if your stage can support them, are excellent for outdoor events to mount equipment.
- Final Checks and Walkthrough (2-3 Minutes):
- Action: This isn’t optional. Double-check every single connection. Are the platforms tight? Legs evenly adjusted? Rails and stairs secured? No visible gaps?
- Stability Test: Have one person walk across the stage while another observes for any movement, creaks, or instability. Use a smartphone level meter app to confirm perfect balance. Ensure the surface is clean and non-slip.
Prioritizing Safety: Non-Negotiables for Any Portable Stage
Even a simple DIY portable stage must be safe. Cutting corners here isn’t worth the risk to performers or the audience.
- Adhere to Local Codes: Always check local building codes and regulations for temporary structures. Heights requiring guardrails (usually 12 inches/300mm) are standard.
- Load Testing is Key: Before anyone steps on your stage, perform a thorough load test. Distribute weight across the surface, exceeding anticipated performer weight by a safe margin.
- Secure the Stage to the Ground: Especially for outdoor events or higher stages, use anchors or weights to prevent shifting or tipping, particularly in windy conditions.
- Leveling is Paramount: Use shims, leveling blocks, or plywood to create a perfectly level base, even on uneven terrain. An unleveled stage is an unstable stage.
- Reinforce Joints: For wood constructions, use ample screws, bolts, and metal brackets to reinforce all joints and connections. Over-engineer slightly for peace of mind.
- Clear Signage & Emergency Plans: Inform performers of stage capacity or any specific restrictions. Have a basic first aid kit available and know emergency exit routes.
Maintenance & Storage: Preserving Your Investment
A simple DIY portable stage, well-maintained, can last for years. This means smart disassembly and storage.
- Careful Disassembly: Reverse the setup steps. Detach components systematically. Don’t rush or force parts apart, as this can cause damage.
- Protect Components: Wrap delicate components (like finished decks) in moving blankets or tarps. Use padding to prevent scratches or dings.
- Optimized Storage:
- Location: Choose a dry, clean, and well-ventilated storage room. Moisture is the enemy, leading to warping and material degradation.
- Organization: Utilize storage containers or racks. Keep all legs, panels, and accessories neatly separated and easily accessible. Label boxes clearly.
- Routine Checks: Periodically inspect your stage components even in storage. Look for signs of wear, loose fasteners, or damage so you can address them before the next event.
The 30-Minute Stage Setup Challenge: Your Practical Playbook
Want to truly master quick stage deployment? Here’s the playbook for a brisk setup.
Essential Tools for Speed Demons
- Stage Transport Trolley: Indispensable for moving components quickly.
- Leg Storage Rack: Keeps legs organized by height and prevents them from scattering.
- Clip-on Rails and Stair Units: Pre-assembled accessories that attach instantly.
- LED Headlamps: For early morning or evening setups in dim lighting.
- Pre-Labeled/Color-Coded Components: Foolproof assembly, especially for different sizes or types of pieces.
The Dream Team: Size Matters
For an average 16ft x 12ft stage, 2-3 experienced people are the sweet spot for a quick setup. More can lead to inefficiencies, fewer can strain speed. Assign clear roles.
Common Pitfalls to Sidestep
- Mixing Up Leg Sizes: Always double-check leg heights.
- Forgetting Tools: Create a checklist and pack a dedicated “stage tool kit.”
- Poor Labeling: Vague labels cause confusion and wasted time.
- Skipping the Rehearsal: Conduct a dry run (if possible) in your warehouse to iron out kinks.
- Neglecting Safety Gear: Always have gloves, goggles, and steel-toed boots on hand.
Recommended Fast-Setup Systems (Even for DIY Inspiration)
While you’re building DIY, draw inspiration from commercial systems known for speed:
- QuickLock Modular Stage Systems: Feature tool-less locking mechanisms.
- Fold & Roll Stage Decks: Often have integrated folding legs.
- Lightweight Aluminium Platforms: With telescopic legs and intuitive assembly designs.
- DIY Translation: Focus on incorporating simple cam locks, strong hinge mechanisms, and easily identifiable components to mimic this speed in your own build.
Quick Answers to Common DIY Stage Questions
How high can a simple DIY stage safely be without professional guardrails?
Any stage exceeding 300mm (12 inches) in height generally requires guardrails for safety, according to most regulations. While you can build higher for DIY, this 12-inch threshold is a good minimum to consider for adding safety railings.
What’s the cheapest way to build a portable stage?
Using free shipping pallets or old milk crates are arguably the most budget-friendly methods. Both can often be acquired at no cost and provide a surprisingly sturdy base when properly secured and topped with an appropriate surface.
Do I need power tools for a simple portable stage?
It depends on the method. While methods like milk crates or simple pallet stages can be assembled with minimal hand tools (zip ties, hammers, drills), methods involving cutting (e.g., school table legs, custom wood frames) will benefit significantly from power tools like an angle grinder or circular saw for efficiency and precision.
How do I make a DIY stage stable on uneven ground?
For uneven surfaces, use leveling blocks, shims, or plywood sheets under the stage legs to create a stable, level base. Always use a level tool (or a smartphone app) to confirm the stage surface is perfectly flat before use.
Can I leave a DIY portable stage set up outdoors for extended periods?
It’s generally not recommended for most simple DIY stages, especially those made from wood or particle board. Exposure to moisture, UV rays, and temperature fluctuations will cause damage, warping, and reduce its lifespan. If you must, use a high-quality weather-resistant cover and ensure all materials are exterior-grade.
Your Stage Awaits: Building with Confidence
Creating a simple DIY portable stage is a rewarding project that empowers you to bring performances to life, wherever they may be. By focusing on cost-effective materials, streamlined assembly, and, most importantly, unwavering commitment to safety, you can build a versatile platform that serves your needs for years to come. Start with the basics, plan meticulously, and remember that even the simplest designs can deliver a professional impact when executed thoughtfully. Your next event’s stage could be just a few clever steps away.

- Simple DIY Portable Stage Solutions for Easy Event Setup - May 30, 2026
- How to Build a DIY Wood Fold Out Stage - May 29, 2026
- Building a DIY Stage for Your Next Performance - May 28, 2026