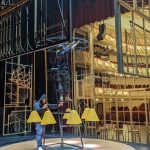
Imagine the buzz of an audience, the spotlight hitting a performer, or the crisp sound of a presentation, all elevated—literally—by a well-built stage. But for many DIY enthusiasts or event organizers, the thought of creating that solid, safe foundation can feel daunting. Learning how to build a stage platform doesn’t have to be a mystery. It’s about combining thoughtful planning with robust construction techniques to create a structure that not only looks professional but also stands the test of time and talent.
This isn’t just about hammering wood; it’s about engineering a temporary, or even permanent, rise for anything from a school play to a live band or a critical product launch. A wobbly platform isn’t just an eyesore; it’s a liability. Our goal here is to equip you with the knowledge to craft a stage platform that inspires confidence, ensuring every moment on it is supported by a foundation of strength and safety.
At a Glance: Building Your Solid Stage Platform
- Strategic Planning First: Define your platform’s purpose, size, height, and crucial weight capacity before cutting a single piece of wood.
- Material Matters: Select the right lumber and fasteners for durability, stability, and longevity, especially for outdoor use.
- Precision in Construction: Follow a step-by-step process, emphasizing squareness, strong connections, and critical bracing.
- Safety is Non-Negotiable: Understand and implement safety measures from protective gear during construction to regular inspections and compliance with local codes.
- Avoid Common Pitfalls: Learn from frequent mistakes like underestimating weight capacity or skimping on material quality.
From Concept to Concrete: Designing Your Platform’s Purpose and Proportions
Before you even think about purchasing lumber, a detailed plan is your most valuable tool. A stage platform isn’t a one-size-fits-all solution; its design must directly reflect its intended use. Are you supporting a single speaker, a full rock band, or a dance troupe? Each scenario dictates different structural requirements.
Start by defining the purpose. A platform for a quiet presentation might have different demands than one hosting a mosh pit-ready concert. Next, precisely measure the size and shape you need. Consider both the performers and any equipment, ensuring adequate clearance. Don’t shy away from curves or angles if they enhance your aesthetic vision; just remember they’ll add complexity to your cuts. The height is another critical decision, impacting material choices and the need for ramps or steps. Taller platforms inherently require more robust bracing and careful leg attachment.
Crucially, calculate the weight capacity. This is where safety truly begins. Account for performers, instruments, sound equipment, lighting rigs, and even potential audience interaction. Always overestimate. For instance, a small theatrical production might need 100 pounds per square foot (psf), while a heavy-duty music stage might demand 200 psf or more.
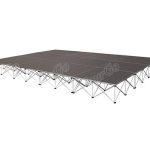
Think about portability. If your platform needs to be moved, stored, or reconfigured, design it in modular sections. Standard sizes like 4×8 feet or 3×6 feet are common for easy transport and assembly. Lastly, set a realistic budget and research local building codes and regulations. For public events, permits or inspections are often required, and ignoring these can lead to costly delays or fines. For a deeper dive into the overall project of building a stage, consider exploring the comprehensive guide on how to Build your own performance stage.
The Right Tools for the Job: Materials and Equipment Selection
The strength and longevity of your stage platform largely depend on the quality of materials and the right tools for assembly. Skimping here can compromise safety and lead to premature wear.
Essential Materials:
- Framing Lumber: For the skeleton of your platform, 2x4s or 2x6s are standard for frames and legs, providing a good balance of strength and manageability. For more substantial or permanent platforms, or for taller legs, 4x4s or even 6x6s offer superior rigidity. If your platform will face the elements, opt for pressure-treated lumber, which resists rot and insects.
- Sheathing/Flooring: The top surface is where all the action happens. ¾-inch thick plywood is the go-to choice due to its strength, stability, and relatively smooth finish. For outdoor stages, consider sturdy decking material designed to withstand weather.
- Fasteners: While nails can join pieces, deck screws are vastly superior. Their threads provide exceptional holding power and resist pulling out, making your structure significantly stronger and more durable. Use 2-inch or 3-inch length screws, ensuring they penetrate deeply into both pieces of wood. Don’t forget construction adhesive, which acts as an additional bonding agent and helps eliminate squeaks.
- Leg Hardware: Depending on your design, specialized brackets, heavy-duty screws, or bolts might be needed to securely attach legs to the main frame, preventing lateral movement.
- Optional Enhancements: Consider wooden pallets for quick, low-height risers (though they lack the structural integrity of a custom build). Sound-dampening materials like mass-loaded vinyl or acoustic foam can significantly improve audio quality beneath the stage. Carpeting or other flooring can enhance aesthetics and reduce noise. Finally, paint, stain, or polyurethane will protect the wood and provide a finished look.
Tools for Precision and Power:
- Cutting Tools: A Circular Saw is invaluable for quick, straight cuts on framing lumber and plywood. For finer work or angled cuts, a Miter Saw or Table Saw offers greater precision. A hand saw is a basic backup.
- Drilling/Driving: A Drill/Driver is essential for pre-drilling holes (to prevent splitting) and driving screws efficiently.
- Measuring & Marking: A Tape Measure, Level (a 4-foot level is ideal), and a Framing Square are critical for ensuring your cuts are accurate and your frame is perfectly square and level.
- Safety Gear: Never compromise on safety. Safety Glasses protect your eyes from flying debris, Ear Protection safeguards against noise, and Work Gloves protect your hands from splinters and impacts.
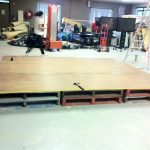
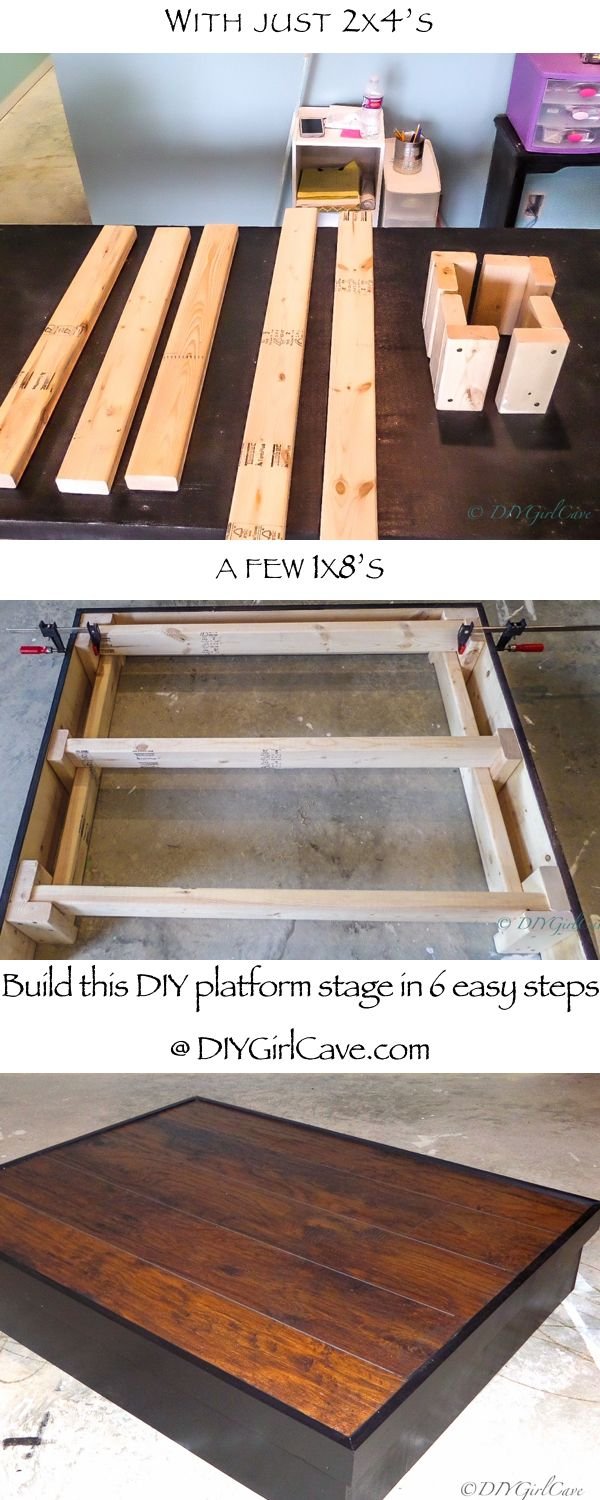
Step-by-Step Construction: Building Your Stage Platform
With your plan in hand and materials ready, it’s time to bring your platform to life. Precision at each step ensures a sturdy and reliable finished product.
- Measure and Cut Your Lumber: Begin by meticulously measuring and marking all your framing lumber (e.g., 2x4s or 2x6s). Use your circular saw (or miter saw for perfect angles) to cut these pieces to the exact dimensions specified in your design. Always double-check your measurements before cutting.
- Assemble the Main Frame: Lay out your cut framing pieces on a flat, level surface. Assemble them into the desired rectangular or square shape of your platform’s base. Apply a bead of construction adhesive to the ends of the lumber before joining them. Secure these joints with at least two 3-inch deck screws per connection, ensuring the frame is perfectly square using your framing square. This initial frame sets the stage for everything else.
- Add Internal Supports (Joists): For any platform larger than 4×4 feet, internal supports, often called joists, are crucial to prevent the sheathing from sagging under weight. Cut additional framing lumber to fit snugly between the long sides of your frame. Space these joists evenly, typically 16 or 24 inches on center, depending on the expected load and sheathing thickness. Attach them with construction adhesive and 3-inch deck screws, toenailing them (screwing at an angle) or using joist hangers for maximum strength.
- Incorporate Cross-Bracing for Rigidity: Beyond joists, especially for taller platforms or those expected to bear significant dynamic loads (like dancing), cross-bracing within the frame itself or between connected leg assemblies dramatically improves stability. This involves adding short pieces of lumber diagonally between joists or vertical supports, forming triangles. Triangles are inherently strong shapes and prevent racking or swaying.
- Build the Legs: Cut your leg lumber (2x4s, 4x4s, etc.) to the precise desired height of your stage. If your performance area has an uneven surface, consider using adjustable leg levelers or designing for shims. Ensure all legs are cut identically for a level platform.
- Securely Attach the Legs: This is a critical stability point. Position the legs at the corners of your frame and at intervals along the perimeter, especially under each joist or at least every 4 feet. Use robust metal brackets designed for structural connections, or drive multiple 3-inch deck screws from the frame into the top of the legs, supplemented by bolts for taller or heavily loaded platforms. For platforms over 18-24 inches tall, add diagonal bracing connecting the legs to the frame or connecting adjacent legs. This prevents the platform from swaying side-to-side.
- Attach the Sheathing/Flooring: Cut your ¾-inch plywood (or decking) to fit precisely over the frame. Lay the pieces onto the frame, ensuring edges are flush and seams fall over a joist for support. Apply construction adhesive to the top edges of the frame and joists before laying down the plywood. Then, secure the sheathing with 2-inch deck screws, spaced every 6-8 inches around the perimeter and along each internal joist. This creates a solid, unified surface.
- Add Under-Stage Support Beams (if necessary): For very large or heavily loaded platforms, or if you anticipate concentrated weight, consider adding additional support beams underneath the primary frame, running perpendicular to the joists and supported by additional legs. This helps distribute weight more evenly to the ground.
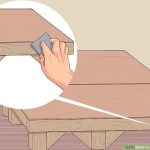
- Finishing Touches: Once the structure is complete, sand down any rough edges or splinter-prone areas to ensure safety for performers and equipment. Apply a protective finish like exterior paint or stain if it’s an outdoor platform, or polyurethane for a durable indoor surface. For improved acoustics and aesthetics, lay down carpeting or other desired flooring material, securing it with adhesive or staples.
- Optional Additions for Functionality:
- Ramps and Steps: If your platform is elevated, construct ramps with a gentle slope or sturdy steps. Always include handrails on ramps and steps for safety, and apply non-slip surfaces.
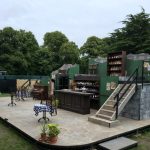
- Stage Skirting: To conceal the underlying frame and legs, and to create a more polished look, attach stage skirting around the perimeter using Velcro or clips.
- Integrate Lighting and Sound (If Applicable): If your stage is part of a larger production, now’s the time to plan for technical elements. Assess your lighting needs (spotlights, floodlights, LED strips) and select appropriate fixtures. Position and mount them securely, planning out all wiring and power supplies. For sound, set up speakers, amplifiers, and microphones. Conceal all wires using cable ties or channels to prevent tripping hazards. Test and calibrate all equipment thoroughly.
- Implement Final Safety Features: Even after construction, continued safety is paramount. Apply non-slip treatments or surfaces to the flooring, especially in high-traffic areas or where performers might move quickly. Install any planned handrails for elevated sections or ramps. Finally, ensure all cables, whether for lighting, sound, or power, are meticulously organized and secured to eliminate tripping risks.
The Foundation of Trust: Ensuring Safety and Stability
A stage platform, by its very nature, supports precious cargo—people and valuable equipment. Prioritizing safety throughout the entire process isn’t just a recommendation; it’s an obligation.
- Safety Gear is Non-Negotiable: When operating power tools, always wear appropriate safety glasses, ear protection, and work gloves. These simple precautions can prevent serious injuries.
- High-Quality Construction: Never compromise on the quality of your materials or the precision of your construction techniques. A platform is only as strong as its weakest joint. Use the recommended fasteners and ensure every connection is tight and secure.
- Accurate Weight Capacity: Revisit your weight capacity calculations frequently. It’s far better to overestimate the load than to risk a structural failure from overloading. If you’re unsure, consult a structural engineer.
- Regular Inspections: Before each use, especially for temporary or frequently moved platforms, conduct a thorough inspection. Check all legs, frame joints, and the sheathing for any signs of damage, loosening, or wear. Address any issues immediately before allowing anyone onto the stage.
- Level and Stable: Always ensure the platform is perfectly level and stable before use. Even a slight wobble can become dangerous during a performance. Use shims or adjustable legs as needed.
- Building Code Compliance: For public events or permanent installations, research and comply with local building codes and regulations. These exist for public safety and may require specific construction methods, materials, or even professional inspections and permits.
Common Pitfalls: What to Avoid When Building Your Platform
Even experienced builders can sometimes overlook critical details. Being aware of these common mistakes can save you time, money, and potential hazards.
- Inadequate Planning: Rushing into construction without a clear plan for size, weight capacity, height, and intended use is a recipe for disaster. This often leads to needing to rebuild or reinforce the platform later.
- Using Cheap or Low-Quality Materials: Skimping on the grade of lumber, using flimsy plywood, or opting for nails instead of screws will compromise the structural integrity and lifespan of your platform. It’s a false economy.
- Poor Construction Techniques: Failing to ensure square corners, leaving loose joints, or not using enough fasteners are fundamental errors. Every connection must be solid and precise.
- Ignoring Safety Guidelines: Neglecting personal safety during construction (e.g., not wearing protective gear) or overlooking structural safety (e.g., inadequate bracing) puts everyone at risk.
- Overloading the Platform: This is perhaps the most dangerous mistake. Pushing a platform beyond its calculated weight capacity can lead to catastrophic failure, injuries, and property damage. Always err on the side of caution.
Quick Answers to Your Platform Questions
How tall can a DIY stage platform be before it gets complicated?
For DIY stages, anything over 18-24 inches significantly increases complexity. Taller platforms require more robust framing (e.g., 4×4 legs), extensive diagonal bracing to prevent sway, and mandatory steps or ramps with handrails. Consulting an engineer for platforms exceeding 3 feet in height is highly recommended.
What’s the best wood for a stage platform?
For the frame, 2x6s are often preferred over 2x4s for better rigidity, especially for spans over 4 feet. For the surface, ¾-inch ACX plywood (A-grade face, C-grade back, exterior glue) is excellent for its smooth finish and strength. If the platform is outdoors, pressure-treated lumber for the frame and marine-grade or treated plywood for the surface are essential.
How do I make my stage platform portable?
Design your platform in modular, manageable sections (e.g., 4×8 ft or 4×4 ft). Use bolts with wing nuts for leg attachment rather than permanent screws, or design legs that slide into receivers. Consider adding heavy-duty casters with brakes to the bottom of the frame for effortless movement, but remember to lock them down securely before use.
Is ¾-inch plywood strong enough for a stage?
Yes, ¾-inch plywood is widely recommended for stage platforms, especially when supported by joists spaced 16 to 24 inches on center. This thickness provides excellent rigidity and weight distribution, preventing noticeable flex under typical performance loads.
Do I need building permits for a temporary stage?
It depends on your local municipality and the platform’s size, height, and intended use (especially if it’s for public assembly). Always check with your local building department or city hall. Even temporary structures might require permits, inspections, or adherence to specific fire and safety codes. Ignoring this can lead to fines or forced dismantling.
Your Next Step: Building with Confidence
Building a stage platform is a rewarding project that combines craftsmanship with practicality. By meticulously planning, selecting quality materials, following precise construction steps, and rigorously adhering to safety protocols, you can create a sturdy, reliable, and professional-looking platform. Whether it’s for a backyard concert, a school event, or a corporate presentation, the principles remain the same: build it right, build it safe, and build it to inspire. Now, grab your tape measure, fire up that saw, and elevate your next performance.

- How to Build a Makeshift Stage Quickly and Affordably - June 9, 2026
- How to Make a Stage Platform Sturdy and Portable from Wood - June 8, 2026
- Construct a DIY Wooden Stage Platform That Folds Flat - June 7, 2026