Imagine needing a robust performance space one evening, only to have it disappear seamlessly by morning. This isn’t magic; it’s the power of a diy wooden stage platform designed to fold flat. Building your own collapsible stage means reclaiming valuable space in your home, garage, or venue without compromising on stability or safety. It’s about smart design, thoughtful material choices, and precision craftsmanship, all culminating in a versatile platform ready for its cue, then ready for storage.
At a Glance: Your Folding Stage Blueprint
- Prioritize Safety & Load: Design for a minimum 125-150 pounds per square foot (PSF) uniform load.
- Modular Advantage: Break down large stages into manageable 4×4 or 4×8 sections.
- Folding Strategy: Integrate heavy-duty hinges to allow modules, or combinations of modules, to fold for compact storage.
- Material Smart: Opt for 3/4-inch exterior-grade plywood for decking and kiln-dried 2x4s for framing, reinforced by robust hardware.
- Removable Legs: Utilize a socket-and-bolt system for quick setup and teardown.
- Stability is Key: Incorporate cross-bracing for stages over 30-40 inches tall and add adjustable feet for leveling.
Beyond the Basics: Why a Folding Platform is a Game-Changer
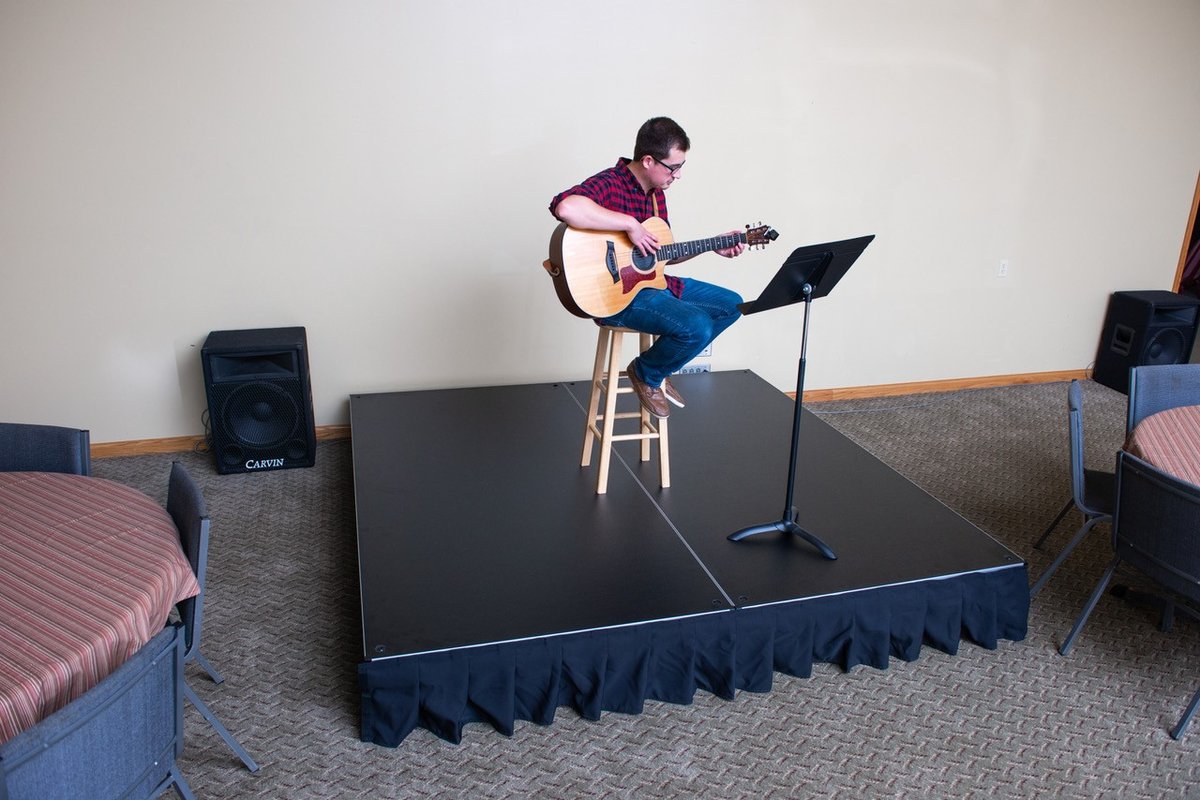
A portable wooden stage platform isn’t just a temporary elevated surface; it’s a strategic asset. For musicians, presenters, or anyone needing to showcase talent or products, a stage that sets up quickly and stows away even faster solves major logistical headaches. You avoid the expense of renting, gain full control over customization, and sidestep the commitment of a permanent structure. This flexibility is what transforms a simple event space into a dynamic performance arena, then back into a functional room.
Thinking about the larger scope of stage construction? You’ll find a comprehensive framework and broader guidance on materials and general planning by reading our main guide. You can Start building your DIY stage with that resource for foundational knowledge before diving into the specifics of a folding design.
Mastering the Blueprint: Planning Your Collapsible Stage
Before the first cut, a solid plan is your most valuable tool. This isn’t just about size; it’s about anticipating every push, jump, and shift your stage will endure.
Purpose, Precision, and Load Capacity
What will your stage hold? A solo acoustic guitarist has different needs than a five-piece rock band or a display for heavy machinery. Define your stage’s primary purpose to determine its maximum safe load capacity. Standard temporary stages demand a uniform load rating of at least 125 to 150 pounds per square foot (PSF). This isn’t merely a suggestion; it’s a safety imperative.
Consider static loads (the weight of the stage itself, equipment, and performers standing still), dynamic loads (performers jumping, equipment being moved), and point loads (a single heavy speaker on one spot). Your design needs to account for the highest anticipated stress. Overbuilding slightly is always a safer bet than underbuilding.
Dimensions and the Art of Modularity
Determine the total length, width, and height based on your performance space and audience size. This decision directly impacts the size and number of your modular components. Most DIY builders gravitate toward standardized sections, often 4-foot by 4-foot or 4-foot by 8-foot, because these align well with standard plywood sheet sizes and are manageable for transport.
For instance, an 8×12-foot stage could be built from three 4×8-foot modules, or six 4×4-foot modules. The key here is “modularity” – building repeatable, interchangeable sections that can be configured in various ways or easily transported individually.
Your Folding Strategy: Where and How to Fold
This is where the “folds flat” part comes in. If you’re building a 4×8-foot module, consider hinging it down the middle along its 8-foot length. This transforms a bulky 4×8 panel into a more manageable 4×4 folded unit. For a smaller 4×4 module, you might hinge it down the middle, making it a 2×4 folded section.
The number of folding sections and their individual dimensions will influence the overall folded size, directly impacting ease of handling, transport, and storage. Visualize the folded stage in your storage space – will it fit? Can you carry it solo, or will you always need an extra set of hands?
The Right Stuff: Selecting Materials for Durability and Portability
Choosing the correct materials is crucial for a diy wooden stage platform that lasts, performs safely, and truly folds flat.
Decking: The Foundation of Your Performance
- 3/4-inch Plywood: This is the industry standard for stage decking due to its rigidity and strength. Use exterior-grade plywood, which resists moisture and warping, especially if your stage might encounter humid conditions or occasional outdoor use.
- Lightweight Plywood: For a significant boost in portability, consider lightweight plywood options. These can be up to 40% lighter than standard plywood, often achieved through multi-layer sandwich constructions, making your folding stage much easier to move. It’s an investment that pays off in reduced back strain.
Frame Lumber: The Backbone of Stability
- Dimensional Lumber (2x4s, 2x6s): For standard frames, 2x4s are perfectly adequate for the perimeter and internal cross-bracing of modules up to 4×8 feet, especially when paired with 3/4-inch plywood. For exceptionally sturdy options or very large modules, you might consider 2x6s, though they add considerable weight. Always opt for kiln-dried lumber to minimize shrinkage and warping over time.
- Legs (4x4s, Round Posts): For the removable leg posts, 4x4s offer excellent stability. Pressure-treated lumber is an excellent choice for legs, particularly if they’ll be handled frequently or exposed to the elements, as it offers superior resistance to rot and insect damage.
Hardware: The Folding Secret and Structural Glue
Your hardware isn’t just for assembly; it dictates how well your stage folds, connects, and holds up.
- Hinges: This is non-negotiable for a folding design. Heavy-duty, load-bearing piano hinges are highly recommended for fold lines. They distribute stress evenly along the entire fold, preventing weak points. Ensure they are securely fastened with screws of appropriate length.
- Fasteners: While nails are quick, screws provide a much stronger, more resilient finish. Use construction-grade screws for attaching decking to the frame. For leg attachment systems or module connections that require rapid assembly/disassembly, carriage bolts with wingnuts or commercial-grade quick-release mechanisms (like specialized stage locks) are invaluable for tool-free setup.
- Locking Mechanisms: Crucial for stability, robust locking mechanisms must secure the platform in both its open (flat) and closed (folded) positions. Think heavy-duty barrel bolts or cam locks to prevent accidental folding or unfolding during use or transport.
- Module Connectors: To link adjacent, independent sections horizontally, use heavy-duty metal plates or interlocking clamps. These ensure precise alignment, prevent shifting, and maintain flush surfaces to eliminate trip hazards. A good connection system makes a multi-module stage feel like one solid unit.
Building It Smart: Step-by-Step for a Folding Platform
Let’s break down the construction process, focusing on how to integrate the folding mechanism effectively.
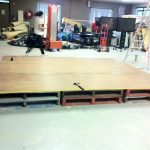
Step 1: Constructing Your Modular Frames
Start by building the frame for each individual module. For a 4×8-foot module that will fold, you’ll effectively be building two 4×4-foot halves that you’ll then hinge together.
- Cut Lumber: Using a table saw or miter saw for precision, cut your 2×4 lumber for the perimeter of your 4×4 sections and internal cross-bracing. Accurate measurements are paramount for a flush final product.
- Assemble Frames: Create a rectangular frame for each 4×4 section. Add internal cross-bracing. For a 4×4 module, a central 2×4 running across the short dimension is a good starting point, possibly with additional blocking. This cross-bracing is vital for minimizing deck deflection and increasing torsional rigidity. Use strong corner joinery, such as reinforced screw connections (pre-drill to prevent splitting).
- Attach Decking: Once the frame for each 4×4 half is assembled and squared, apply a generous bead of construction adhesive to the top edges of the frame. Lay your 3/4-inch plywood decking on top, aligning edges perfectly. Secure the plywood to the frame with screws every 6-8 inches along all framing members. This creates a strong, stiff “skin.”
- Case Snippet: “For our community theater, we needed four 4×8 stage sections that could fold for storage. We built each 4×4 half of a 4×8 module with a central brace, then laminated the 3/4-inch plywood with strong adhesive and screws. The dry-fit was critical to ensure all 16 4×4 sections would align perfectly later.”
Step 2: Integrating the Folding Mechanism
This is where your modular sections become a truly folding platform.
- Position for Folding: Place two finished 4×4 frame-and-deck sections side-by-side, perfectly aligned along the edge where they will fold. This might mean laying them out to form a 4×8 unit, or whatever larger shape you’ve designed.
- Attach Piano Hinges: Position your heavy-duty piano hinge along the full length of the joint where the two sections meet. For a 4-foot joint, a single 4-foot piano hinge (or two 2-foot hinges) is ideal. Ensure the hinge is oriented so that the stage folds inward for protection, or outward to lie perfectly flat when stacked.
- Secure Hinges: Pre-drill pilot holes to prevent wood splitting, then securely fasten the hinge to both plywood decks and underlying frame members using appropriate length screws. The hinge must be load-bearing; don’t skimp here.
Step 3: Crafting the Removable Leg System
A robust, removable leg system ensures stability when open and allows the platform to truly fold flat for storage.
- Socket/Sleeve Installation: At each corner of your completed folding module (e.g., at each corner of the 4×4 halves when unfolded to a 4×8), you’ll install a socket or sleeve system. This typically involves attaching robust 2×4 or 2×6 blocks to the inside corners of your frame, creating a snug receptacle for the leg posts. You can also buy specialized metal leg sockets.
- Leg Posts: Cut your 4×4 or round leg posts to the desired stage height. For a 30-inch stage, a 4×4 leg would be cut to 28.5 inches (accounting for the 1.5-inch frame thickness).
- Securing Legs: Drill a bolt hole through your frame’s corner blocks and through the leg post itself (when inserted into its socket). Use a carriage bolt with a wingnut for tool-free, rapid breakdown and assembly. This single bolt-and-wingnut system is remarkably efficient.
Step 4: Connecting Modules and Enhancing Stability
If your final stage involves multiple folding modules, you’ll need a way to connect them securely.
- Horizontal Connection: Lay out your folding modules side-by-side. Use heavy-duty metal plates, flat corner braces, or interlocking clamps to secure adjacent frames horizontally. These connectors should prevent any shifting and maintain flush surfaces across the entire stage, eliminating trip hazards. Position them strategically along the edges of the modules, typically every 2-3 feet.
- Cross-bracing for Height: For stages exceeding 30 to 40 inches in height, diagonal cross-bracing is absolutely essential. This counters horizontal forces and prevents dangerous side-to-side sway. These can be removable wood or metal braces that attach to the legs or frame undersides. Gussets (triangular plates) at frame corners also significantly enhance structural integrity.
- Leveling: Even the most precisely built stage will wobble on an uneven floor. Incorporate adjustable feet or leveling jacks into the bottom of your stage legs. These screw in or out to compensate for irregularities. For fixed-height legs, simple wooden shims are a quick, effective solution to prevent wobble.
Safety First, Always: Ensuring a Secure Performance
No matter how impressive your diy wooden stage platform looks, safety must be paramount.
- Load Distribution: Ensure weight is distributed evenly across the entire supporting structure. This means closely spaced internal supports within your modules and reinforced load-bearing points, especially where legs attach.
- Preventing Sway: As mentioned, cross-bracing is critical for taller stages. Even for lower stages, periodic checks for loose connections are important. A stage that sways is a stage that’s unstable.
- Non-Slip Surface: Apply a durable, non-slip finish to your plywood deck. Options include industrial-grade textured paint, commercial grip tape, or even a bolted-down rubber mat. This drastically increases traction and prevents slips and falls.
- Edge Treatment: Round or bevel all exposed edges of the plywood deck and frame. Sharp edges are not only prone to damage but are also significant trip and injury hazards.
- Regular Inspections: Before and after every use, inspect all components: hinges, fasteners, leg connections, and the deck surface. Look for loose screws, cracks, splintering wood, or any signs of wear that could compromise safety.
The Pro Touch: Enhancements & Durability Tips
Elevate your folding stage beyond basic functionality with these considerations.
- Protective Coatings: Wood is susceptible to moisture and UV damage. Apply marine-grade varnish or epoxy sealants to all wooden surfaces. This extends the platform’s lifespan significantly, especially if stored in non-climate-controlled environments or used outdoors.
- Aesthetics: Consider adding skirting around the perimeter of the stage. This hides the structural elements, creates a clean, professional look, and can prevent items from rolling underneath. Paint or stain the wood to match your aesthetic.
- Transport Aids: Even a folding stage can be heavy. Attach sturdy handles to the sides of each module. For moving folded modules, a heavy-duty hand truck or dolly is invaluable.
- Storage Solutions: Designate a specific, dry, and flat area for storage. Stack folded modules carefully, perhaps with padding in between, to prevent damage.
Quick Answers: Your Folding Stage Questions
How high can I make my stage before I absolutely need cross-bracing?
Generally, any stage exceeding 30 to 40 inches in height requires diagonal cross-bracing to prevent side-to-side sway and increase dynamic live load capacity. For lower stages, it’s still a good idea for extra rigidity, but becomes critical at these heights.
Can I really build a multi-module folding stage by myself?
Yes, absolutely! The modular design is specifically intended to break down a large project into manageable, repeatable sections. While assembling the full stage might be easier with a helper, building and handling individual 4×4 folding modules is often a one-person job.
What’s the best way to transport these folding modules?
For individual modules, especially when folded, a good heavy-duty hand truck or furniture dolly is a lifesaver. If you’re moving multiple modules, a small utility trailer or a van can accommodate them when laid flat. Always lift with your legs, not your back, and consider getting a friend to help with heavier sections.
How do I store my DIY wooden stage platform long-term?
Store your folded modules in a dry, level area, ideally off the ground to prevent moisture wicking. You can stack them flat, with a piece of cardboard or blanket between each module to prevent scratching. Keep them out of direct sunlight and extreme temperature fluctuations to prolong their life.
What if my performance space has an uneven floor?
This is a common challenge. The best solution is to incorporate adjustable leveling feet into the bottom of your stage legs. These allow you to fine-tune the height of each leg to compensate for unevenness, ensuring a perfectly level and stable platform. For fixed-height legs, simple wooden shims can do the trick in a pinch.
Your Next Step: Building a Stage That Stands Up (and Folds Down)
Constructing a DIY wooden stage platform that folds flat is a rewarding project that marries practicality with performance. By meticulously planning, selecting robust materials, and employing smart construction techniques, you’ll create a versatile asset that serves your needs for years to come. Take your time, focus on precision, and always prioritize safety. Your collapsible stage is ready to empower your next performance, then tuck away neatly until its next spotlight moment.

- How to Build a Makeshift Stage Quickly and Affordably - June 9, 2026
- How to Make a Stage Platform Sturdy and Portable from Wood - June 8, 2026
- Construct a DIY Wooden Stage Platform That Folds Flat - June 7, 2026